Ok

Ok

What is the question
Cancel
PICTURE FRAMES
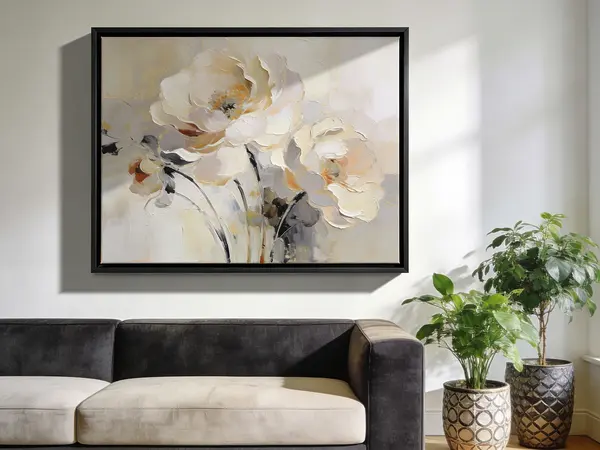 CUSTOM PICTURE FRAMES
CUSTOM PICTURE FRAMES
Design Your Framing Package Online!
Add Mats, Glass & Acrylic, Mounting Board And More.


Search
☰
My Account
Log In
Favorites
Saved Designs
Shopping Cart

Everything you need to know about floater picture frames for canvas and wood panels, including sizing, reveal (shadow gap), rabbet depth, mounting hardware, finishes, and common mistakes. Written for artists, photographers, galleries, and home decorators.
What is a floater picture frame
A floater picture frame is designed for canvas and wood panel artwork. Instead of covering the edges like a traditional frame, the floater frame creates a visible shadow gap, also called a reveal, around the art. This gap makes the art look like it is floating inside the frame.
Key floater frame terms
- Reveal: the visible shadow gap between art and frame
- Rabbet depth: the interior depth of the frame that accepts the art
- Face width: the visible front edge of the frame
- Back plate, foot or base: the inside surface where the art is secured
How to measure your canvas or panel
- Measure width and height of the artwork to the nearest 1/16 inch.
- Measure thickness at the thickest point, including the stretcher bar, keys, or cradle. Be sure to measure the corners where there is often a larger measurement due to the fabric being thicker.
- Check for proud staples or screw heads that might require extra clearance.
Write the numbers as width x height x thickness. Example: 24 x 30 x 1.5 in.
Choose reveal and frame size
The total reveal (sum of both sides) drives the floating effect. Most customers prefer a balanced look that is not too tight and not too wide.
Note if the canvas has a gallery wrap, which can affect reveal preference.Recommended total reveal by artwork size
- Small art up to 12 inches: 3/16 inch to 1/4 inch total
- Medium art 12 to 36 inches: 3/8 inch to 1/2 inch total
- Large art 36 inches and up: 5/8 inch to 3/4 inch total or more
To calculate the frame opening, add the total reveal to both the width and the height.
      Frame opening width  = art width  + total reveal
      Frame opening height = art height + total reveal
Example: 24 x 30 art with a 1/2 inch total reveal results in a 24.5 x 30.5 inch frame opening. This will result in a 1/4 inch reveal on all sides.
Pick the correct rabbet depth
Rabbet depth must be greater than the art thickness plus any hardware you use. Add at least 1/8 inch clearance for comfort.
| Art thickness | Minimum rabbet depth | Room for hardware |
|---|---|---|
| 3/4 in panel | 3/4 in rabbet | Yes |
| 1.5 in canvas | 1.5 in rabbet | Yes |
| 2 in deep canvas | 2 in rabbet | Yes |
If the rabbet is too shallow, the canvas may sit proud of the back or the screws may not seat. Choose the deeper option if you are between sizes.
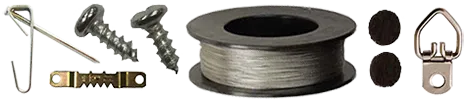
Mounting methods for floater frames
Offset clips
Offset clips bridge from the inside of the frame to the back of the canvas or panel. They come in several offsets to match thickness. Pre drill pilot holes and do not over tighten.
Spacer blocks
Wood blocks glued or screwed to the back plate can set the reveal consistently. Paint or finish the blocks to match the frame interior.
Direct screw from back
This is the preferred method as it is clean and adds no extra hardware to the back of the frame. Pre-drill and counter sink through the back plate of the frame so you can screw directly into the canvas or panel. Always test and use caution that the screws are not long enough to penetrate the face of your artwork.
Always test fit the art in the floater frame without hardware to confirm the reveal is even on all sides.
Special Case Depths
It is common to use a deep float frame with art that is not as deep as the float frame is. For example, a float frame allows for a canvas that is 1-1/2 inch but the art you have is 3/4 inch or even smaller 1/4 inch and it's a panel. The way to accomplish this is to build a cradle.
- Cradle for the 3/4 inch is accomplished by drilling through the foot of the frame and putting a small wood block to take up the space. The wood block would also be drilled and the screw would go through the foot of the frame through the wood block and finally into the stretch bar.
- Cradle for thin 1/4 inch panel. This depth art is too risky to drill into so it needs to be glued or use silicone. Cut wood strips that are nailed or screwed into the foot of the frame. Then the art can be attached to this cradle.
Finishes and wood options
- Natural wood: maple, cherry, walnut, ash, oak
- Painted: satin black, matte white, gallery gray
- Special: gold leaf accents, wire brushed texture
Match the finish to the art. Black creates a clean gallery look. Natural wood adds warmth. White blends with white walls and keeps focus on the art.
Common mistakes to avoid
- Reveal too tight. The art looks crammed and edges may rub the frame.
- Reveal too wide for small art. The frame stops supporting the composition.
- Rabbet depth too shallow. Hardware hits the back or canvas sits proud.
- No pilot holes. Screws split the wood or strip out.
- Mounting without a dry test fit. Reveal ends up uneven.
Quick sizing calculator
Enter your art size and total reveal to calculate the floater frame opening.
FAQ
What is the difference between a floater frame and a traditional frame
A traditional frame overlaps the art edge with a lip. A floater frame shows a gap all around, so the art appears to float.
Do I need a liner or mat with a floater frame
No. Floater frames are intended for canvases and panels without mats. If you want a mat, consider a traditional frame instead.
Which finish should I choose
Black for a gallery look, white for minimal, natural wood for warmth. Match or contrast the wall color and the dominant tones in your art.
Do I use glass with a float frame
No, there is no way to hold the glass against the art.
Related resources
Next steps
Ready to order your floater picture frame with the correct reveal and rabbet depth