Ok

Ok

What is the question
Cancel
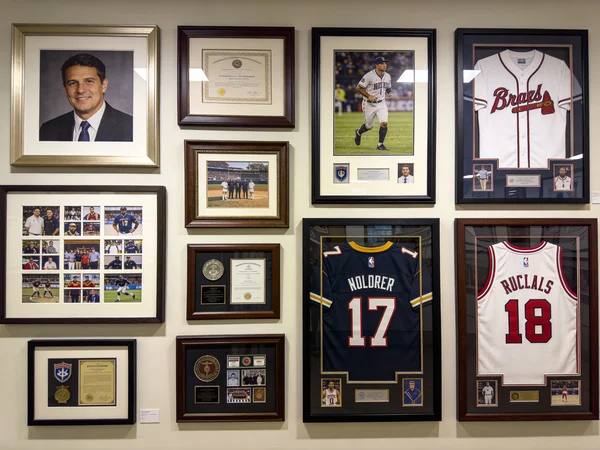
PICTURE FRAMES
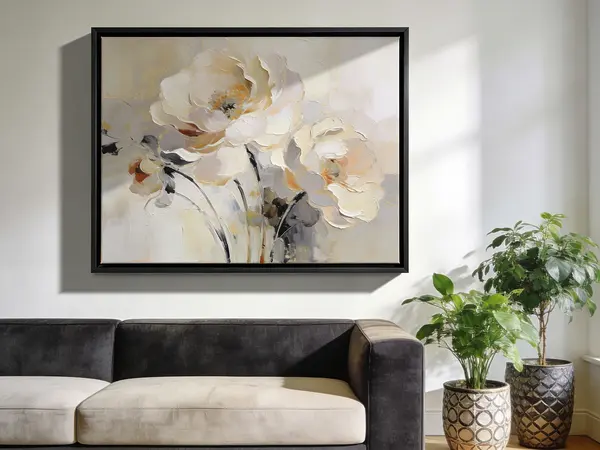 CUSTOM PICTURE FRAMES
CUSTOM PICTURE FRAMES
Design Your Framing Package Online!
Add Mats, Glass & Acrylic, Mounting Board And More.


Search
☰
My Account
Log In
Favorites
Saved Designs
Shopping Cart

This guide is focused on assembling the metal picture frame (rails, corner hardware, squareness, and tight joints).
Watch the video
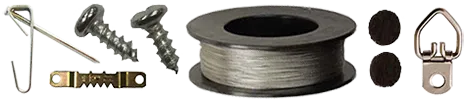
What you got in the box (assembly parts)
- Metal frame rails (2 long rails and 2 short rails)
- Corner hardware (two parts per corner: a tapped corner with screws and a back plate)
- Acrylic
- Backing Board
Step 1: Lay out rails and corners
Put one long rail directly in front of you and place one short rail to the right. Working in this orientation makes it easy to build tight joints because you can brace your arm on the table and clamp the corner while tightening.
- Work on a flat table. The flatter the surface, the easier it is to keep joints closed and the frame straight.
- Lay out your rails as a rectangle so you can confirm orientation before inserting any hardware.
- Stage your corner parts so you do not have to hunt for them mid-assembly.
If you are assembling a large metal frame, it is often easier with two people when you go to close the last rail. The same is true for assembly: a helper makes it easier to keep the frame square while tightening the last corners.
Step 2: Assemble your first corner (tight joints)
Tthe goal is a corner that is closed, straight, and tight. The key is to snug first, inspect the joint, then tighten progressively while clamping.
Insert the corner parts into the rear channel
There are 2 pieces: (1) a tapped corner with screws and (2) a back plate. You sandwich these together, then insert them into the groove on the back of the metal frame rail.
- Hold the long rail in front of you.
- Hold the short rail to the right.
- Sandwich the tapped corner and back plate together.
- Insert the corner assembly into the rear channel (groove) of the rail.
- Slide the mating rail onto the corner assembly until the corner is seated.
Clamp the joint and snug both screws
Put your hand and elbow on the table, and use your hand as a vice grip over the outside of the joint. This stabilizes the parts so you can snug the screws without the corner walking open.
- With the frame on the table, press the corner together firmly.
- Snug the first screw, then snug the second screw (do not go fully tight yet).
- Inspect the joint line. If it is not closed, loosen one screw slightly and "shimmy" the joint closed while clamping.
- Once the joint is closed, tighten one screw more, then tighten the other, then re-check.
Optional alignment tap (use caution)
Lightly tap the joint with the screwdriver handle to line it up. Only do this gently, and only if you are confident you will not mar the metal finish.
Step 3: Build a U shape
Repeat the same corner process to build a "U" shape: three rails connected with two corners. This is a stable shape that makes it easier to close the frame later.
- Assemble the first corner (long + short) and tighten for a clean joint.
- Assemble the second corner so you have three rails forming a U.
- On each new corner: snug both screws, inspect, adjust (shimmy) if needed, then tighten progressively.
Tip: Sometimes the corner hardware is slightly too tight to start into the groove. If it will not insert smoothly, back the screws off a little, start it, then snug again once seated.
Step 4: Install the final rail and close the frame
The last rail requires you to start hardware in both corners at the same time. Go slowly and keep the frame supported on the table so you do not twist the rectangle.
- Stage the last long rail near the open side of your U.
- Insert the corner hardware into the last rail (both ends) so it is ready to start.
- Start both corners into the rear channel grooves. If one is too tight, back the screws off slightly and try again.
- Make sure the rail is seated evenly along the back edge and the corners are fully started.
Tip: On this last step, clamp hard with your fingers while watching the back edge. You want a straight back edge and a joint that closes fully.
Step 5: Tighten evenly and keep the frame straight
Righten "snug", checking the joint, then tightening more. Apply that concept across the last two corners: tighten in small increments, alternating corners, so you do not twist the frame out of square.
- Snug both screws on one corner, then snug both screws on the opposite corner.
- Clamp each joint closed while tightening.
- Check the joint line. If a gap appears, loosen slightly, press closed, then retighten.
- Visually check the back edge: it should look straight with no "step" at the corners.
If you want a quick squareness check, measure corner-to-corner diagonals. Matching diagonals indicates the frame is square.
Troubleshooting: corners, tight hardware, and gaps
Hardware will not start in the groove
Back the screws off a little to reduce tension, start the hardware in the channel, then snug it back up once seated.
Corner gap after tightening
Use the "snug then inspect" method. Loosen one screw slightly, clamp the corner closed, shimmy as needed, then tighten progressively. Tighten both screws evenly rather than fully tightening one first.
Frame looks twisted
Twist usually comes from tightening one corner completely before the opposite corner is seated. Back off slightly, press the frame flat on the table, snug opposite corners, then tighten in small increments.
Quick assembly checklist
- Rails laid out and oriented correctly before inserting hardware
- Corners started smoothly (if tight, screws backed off slightly)
- Each corner: snug both screws, inspect, adjust (shimmy) if needed, then tighten
- Frame built as a U first, then closed with the final rail
- Last corners tightened evenly while clamping for closed joints
- Back edge looks straight and joints look clean
FAQ
What is the best way to get tight, closed corners?
Clamp the corner closed with your hand, snug both screws, inspect the joint, then loosen slightly and shimmy closed if needed before tightening progressively.
Why are my corners hard to start?
Back the screws off slightly, start the corner hardware in the groove, then snug back up once the parts are seated.
Should I tighten one screw fully before the other?
No. Snug both first, then tighten in steps. This helps keep the joint closed and reduces twisting.
Next steps
Your metal picture frame is now assembled. If you want the follow-up "fit" process (acrylic, backing, spring clips, hangers, wire, bumpers), the same video continues into those steps after assembly.