Ok

Ok

What is the question
Cancel
PICTURE FRAMES
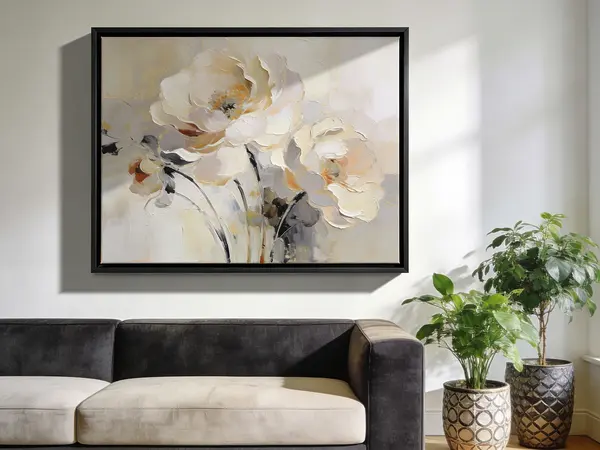 CUSTOM PICTURE FRAMES
CUSTOM PICTURE FRAMES
Design Your Framing Package Online!
Add Mats, Glass & Acrylic, Mounting Board And More.


Search
☰
My Account
Log In
Favorites
Saved Designs
Shopping Cart
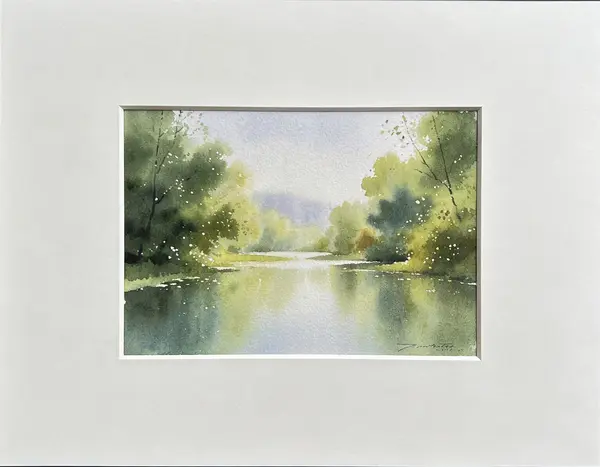
How to Measure Artwork for a Custom Mat
In this video, I'm going to go over a few different scenarios on how to measure to get the mat size right for your art. In this first piece, what we have is some fine edge detail that we don't want to lose. I want to make sure I see part of this purple behind my mat and I want to make sure I see a lot of that kind of fun brown there towards the bottom.
When we measure for this piece, basically what I do is I get my measurement, and I say that my measurement is 5 11/16 exact, and I say that my other edge is 5 15/16 exact. So then I'm going to say, "Well, you know what? Because I really want to make sure that the inside of my mat is what I want, I'm just going to subtract off 1/16" off of the side of each of those, so I'm going to input that I want a window hole of 3 7/8 by 5 9/16, and I'm going to enter that for my window size of my mat, that's what my artwork size is. I'm putting in where I've just cropped a tiny little bit off.
Always make sure that you measure at the bottom, the middle, and the top, and the side, the middle, and the top here also just to make sure your piece is square, and if there's a little bit of border around that you're taking into consideration where you're measuring. You want to make sure that what you're dealing with, you're taking in all aspects of your piece. That way when you get your mat and it's cut with just what you want to see, you barely lose anything around that piece. That's a little bit more of a difficult one. We'll get to some easier ones here in a minute.
Let's move on to another piece where we have a couple of things happening. We have this green border around and we have a white border, and we've decided, you know what? I want to see a little bit of this white border. So once again, I'm going to do that same thing. I'm going to measure and get my exact size, because I want to see about an eighth of an inch on each side, so I'm going to say, "Well, my artwork is really five inches," and I'm going to put my tape measure out here to an eighth of an inch over and an eighth of an inch over by 7 1/8. So entered 5 1/8 by 7 1/8 for what my art size is. When the mat comes to you, it's cut at those dimensions and you see that eighth of an inch all the way around, essentially. So you've measured just exactly what you want to see. Similar to our first example but kind of backwards. You want to see a little bit outside of what your artwork size is.
The last example that we have is a more traditional piece where you have a white border that you don’t want to see, and you don't have any fine details around the edges that you care about losing. You can crop in here, and this image is still going to look just as good if it's cropped in and it's going to make your life easier, because when you get your mat on there if you had a mat cut to where the outside size was right on each edge basically, it would be difficult for you to keep your artwork behind here and not have it shift without seeing some of that white edge and being distracting, so it's always nice to crop when you can.
That being said, I measure this and my art work measures, from this edge to this edge, 10 inches, and then it measures, from this edge to this edge, right at 8 inches. So I can input 10 by 8 as my image size. Then on my edge selection, I can say I want to cover a quarter of an inch. I'll lose a quarter of an inch on this side and a quarter inch on this side, same on top and bottom, but that's not a big deal.
So then, when I have my mat cut I have plenty of allowance to position the art in a lot of different places and it still is easy and I'm not showing any of that border around, and it's not going to fall through my mat, of course, and that is how I would measure for this piece. See I can even fit it to catch as much of that blue sky I can up there, or I can say, "Oh, I don't really want any of that blue sky," and I can shift it down here and get rid of some of that blue sky that's up in the top, so it gives you a little bit of play , basically, on what you control after you input your sizes. You can play with that once you've cropped out just a little bit.
Made in the USA
Handcrafted by American framing experts
Family Owned
Serving customers for over 40 years
Premium Shipping
Professionally packaged for safe delivery
Ready to Hang
Hardware included with all frames
Framing Specialists
Over 40 years of custom framing experience