
Ok

Ok

What is the question
Cancel
PICTURE FRAMES
 CUSTOM PICTURE FRAMES
CUSTOM PICTURE FRAMES
Design Your Framing Package Online!
Add Mats, Glass & Acrylic, Mounting Board And More.




Search
☰

My Account
Log In
Favorites
Saved Designs
Shopping Cart
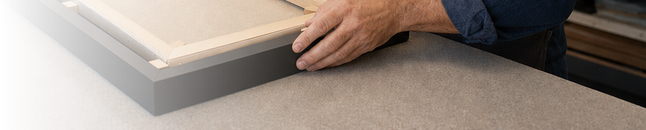
Created by WebPictureFrames.com framing specialists, this video-driven guide shows how to center and secure stretched canvas or a rigid art panel in a floater frame while preserving an even reveal.
Quick answer
Place the stretched canvas or panel inside the floater frame and use equal-thickness cardboard spacers to create the same reveal on every side. Support the artwork while turning the assembly over. Secure a stretched canvas through the frame's countersunk mounting holes with screws that remain safely inside the wooden stretcher bars. For a thin panel, do not use screws that could pierce the artwork; use suitable double-sided mounting tape instead. Remove the spacers only after the artwork is secure.
Watch: install canvas or a panel in a floater frame
This 7-minute, 38-second demonstration covers both major installations: stretched canvas secured with supplied screws and thin rigid panels mounted without screws.
Choose the correct mounting method
The correct method depends on the construction and thickness of the artwork.
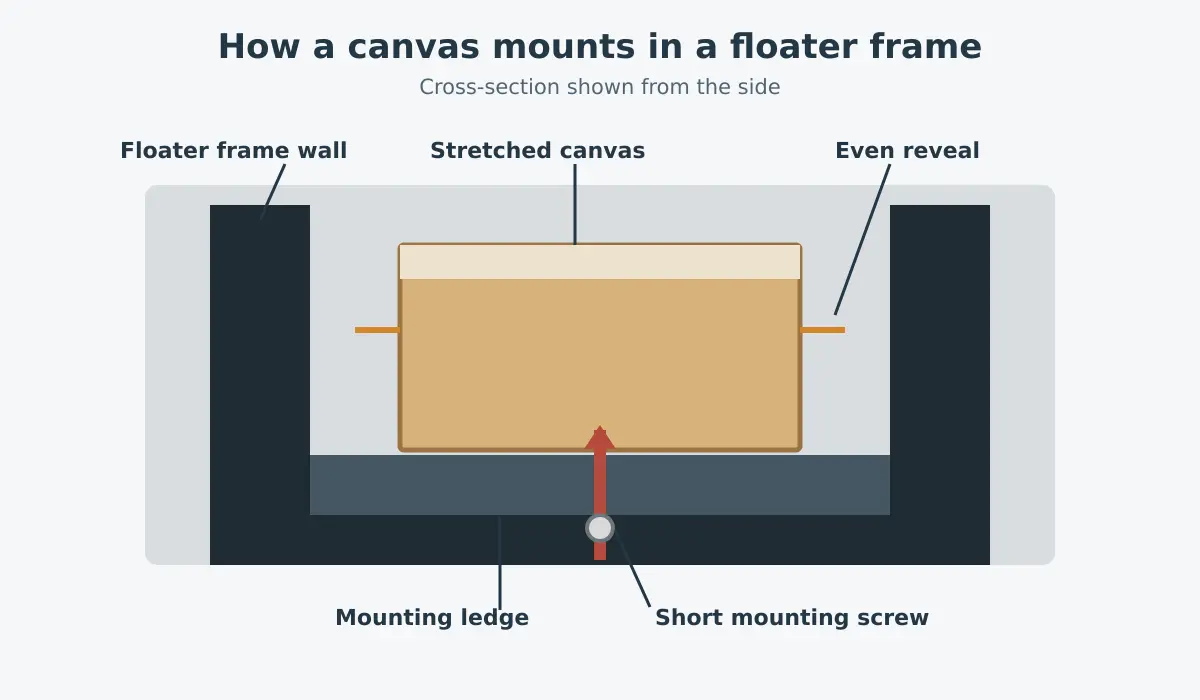
- Stretched canvas: Mount through the floater frame's rear ledge into the wooden stretcher bars, provided the supplied screws cannot reach the front of the canvas.
- Thin rigid art panel: Use suitable double-sided mounting tape because a screw may pass completely through the panel.
- Artist-owned panel intended for a long-term installation: Small, separated dots of appropriate adhesive are another option, but this is less reversible and should be chosen by the artwork's owner.
Tools and materials
- A floater frame compatible with the artwork's exact width, height, and depth
- The stretched canvas or rigid panel
- Clean cardboard spacer pieces cut to equal thickness
- Supplied mounting screws for a safely compatible stretched canvas
- Supplied or artwork-appropriate double-sided mounting tape for a thin panel
- A screwdriver or drill/driver used with careful pressure
- A flat, clean, padded work surface
- A blunt tool for removing tight spacers
Before driving any screw: compare the screw's effective penetration with the stretcher-bar thickness. The screw must remain safely within the wood. Never risk driving it through the face of the canvas.
Step 1: Center the artwork and set the reveal
- Place the floater frame face up on a clean surface.
- Set the canvas or panel inside without forcing it against a frame wall.
- Insert equal-thickness cardboard spacers between the art and frame on all four sides.
- Add or substitute thinner cardboard, such as clean cereal-box board, when a small adjustment is needed.
- Measure or visually compare the gap on every side until the reveal is even.
The shipping carton is useful spacer material because it is already available and can be cut into small, consistent pieces. Keep spacer surfaces clean so they do not mark the artwork or finish.
Step 2: Support the art and turn the assembly over
Tip the perimeter spacers down so friction holds them in place. If the canvas sits below the back of the frame, cut additional support strips equal to that difference and place them beneath the canvas before turning the assembly over. Keep the supports over the stretcher bars rather than pressing into the canvas fabric.
- Confirm that every perimeter spacer remains snug.
- Support the artwork and frame together with both hands.
- Turn the assembly face down onto a clean, padded surface.
- Before fastening, verify that the canvas or panel has not shifted.
Large artwork: use a second person. One person can support the frame while the other keeps the artwork and spacers from moving.
Step 3A: Secure a stretched canvas with screws
WebPictureFrames floater frames intended for stretched canvas may arrive with countersunk mounting holes and appropriately selected screws. The video demonstrates 5/8-inch screws, but always verify safe penetration against your actual stretcher bar before installation.
- Drop one screw into each countersunk mounting hole.
- Reach around and apply light support directly over the wooden stretcher bar.
- Start the first screw only until it begins drawing the stretcher bar toward the frame ledge.
- Start every remaining screw in the same manner before tightening any one screw fully.
- Return to each screw and snug them gradually around the frame.
- Stop when the canvas is held securely. Do not crush, bow, or distort the stretcher bars.
Step 3B: Mount a thin art panel without screws
A thin panel does not provide enough depth for a conventional mounting screw. If the order specifies a thin panel, the frame may arrive without drilled holes and with double-sided mounting tape instead.
- Apply multiple small pieces of mounting tape around the floater frame's support ledge. Use more pieces for a larger or heavier panel.
- Keep the protective liner in place until the pieces are positioned correctly.
- Use spacers or a helper to guide the panel into the frame without touching the adhesive prematurely.
- Lower the panel gently and check the reveal before applying pressure.
- Fine-tune the position while the adhesive contact is still light.
- Once the reveal is even, press over the taped areas to secure the panel.
For an artist-owned panel intended to remain in the frame, small separated dots of suitable white glue may provide a stronger attachment. Do not apply a continuous line of glue: individual dots are easier to release later. Consider the artwork's material, value, and future reframing needs before using any adhesive.
Step 4: Remove spacers and inspect the installation
- Turn the secured assembly face up.
- Remove every cardboard spacer carefully.
- Use a blunt screwdriver or similarly safe tool if a spacer is tight. Avoid knives near the artwork and finished frame.
- Inspect the reveal on all four sides.
- Confirm that the artwork is secure and not bowed.
- Install the appropriate hanging hardware and bumpers.
Common installation mistakes to avoid
- Using screws that are too long: they can penetrate the canvas or panel.
- Tightening one screw fully first: this can pull the canvas off center before the other screws are started.
- Removing spacers too early: leave them in until the artwork is secure.
- Pressing on canvas fabric: support the wooden stretcher bars, not the fabric.
- Dropping a panel directly onto exposed tape: align it carefully before applying firm pressure.
- Using a continuous glue bead: separated dots are more serviceable if the artwork must be removed later.
- Using a sharp knife to retrieve spacers: choose a blunt tool that is less likely to damage the art or frame.
Video chapters
Frequently asked questions
How do I keep the reveal even around a canvas?
Use equal-thickness pieces of clean cardboard as temporary spacers on every side. Thin packaging board can provide smaller adjustments when ordinary corrugated cardboard is too thick.
Can I screw a thin art panel into a floater frame?
Not when the screw could pass through the panel. Use suitable mounting tape or another artwork-appropriate adhesive method instead.
How tight should the canvas mounting screws be?
Snug enough to hold the stretcher bars securely against the mounting ledge, but not so tight that the bars bow, crush, or pull the canvas out of alignment.
Can the panel be removed later?
The tape shown in the video is strong but can generally be separated with care. Future removal depends on the tape, panel surface, age, and environment. Adhesive mounting is not as mechanically reversible as screws into a wooden stretcher bar.
Do all floater frames use the same reveal?
No. The reveal is a design choice and may also be affected by frame construction and artwork squareness. Confirm the intended reveal when ordering and use spacers that reproduce it evenly during installation.
Choose your next step
Shop canvas floater framesChoose custom sizes, supported canvas depths, reveals, and finishes.
Shop art panel floater framesFind frames intended for thin panels, canvas boards, and rigid artwork.
Read the complete floater-frame guideLearn how to measure, select depth, choose a reveal, and avoid ordering mistakes.
Compare all floating-frame optionsStart with the main hub for canvas and panel applications.
Made in the USA
Handcrafted by American framing experts
Family Owned
Serving customers for over 40 years
Premium Shipping
Professionally packaged for safe delivery
Ready to Hang
Hardware included with all frames
Framing Specialists
Over 40 years of custom framing experience