
Ok

Ok

What is the question
Cancel
PICTURE FRAMES
 CUSTOM PICTURE FRAMES
Design Your Framing Package Online!
Add Mats, Glass & Acrylic, Mounting Board And More.





Search
☰

My Account
Log In
Favorites
Saved Designs
Shopping Cart
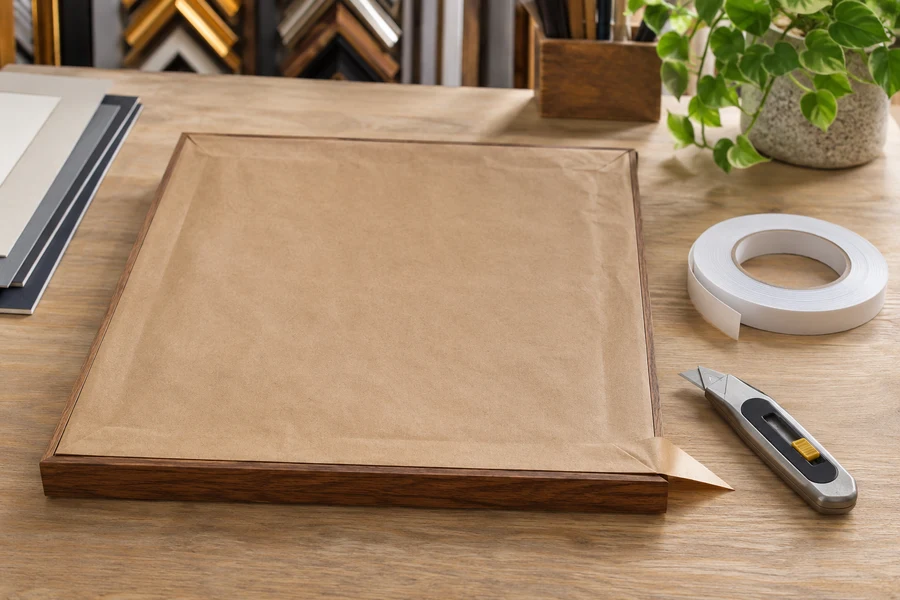
A paper dust cover finishes the back of a fitted wood frame. Secure the artwork first, then prepare the tape, oversized paper, turning space, and controlled trimming steps.
Watch: How to Add a Paper Dust Cover to a Wood Frame
Finish fitting before adding the paper
Begin with the artwork package already held in the wood frame by compatible retainers. A paper dust cover finishes the back; it does not hold the artwork in place. Check the front for dust and alignment and secure the backing before covering the opening.
Have an oversized sheet of backing paper, double-sided framing tape, and a sharp trimming blade ready. Work on a clean, protected surface. Select paper and adhesive suitable for your project; the brown color alone does not establish archival properties.
Dust-cover problems and corrections
| Problem | What to inspect |
|---|---|
| One edge lifts. | Check liner removal, surface condition, tape placement, and the selected adhesive instructions. |
| The paper does not reach a side. | Reassess sheet size and placement rather than stretching it across the opening. |
| The trim tears. | Check blade control and whether the cut is complete before pulling the waste. |
| The backing moves behind the paper. | Reopen as needed and correct retention; the cover is not the retainer. |
| A front defect is noticed. | Correct the internal fitting issue before treating the back as finished. |
Apply tape around the back rails
- Place the fitted frame face down on the protected work surface.
- Apply double-sided tape around the flat back surfaces of the frame rails, following the back-rail perimeter.
- Keep the tape on the frame where the paper will attach. Peel away its release liners before setting the frame onto the paper.
Do not bridge the opening with tape or use the paper to compensate for loose retaining hardware. See how to secure the artwork package first if it moves.
Set the frame onto oversized paper
- Lay the paper flat with enough excess beyond every side of the frame.
- Turn the frame face up and lower its taped back onto the paper. Keep the frame square to the sheet.
- Press along the frame perimeter to establish contact. Avoid pressure on the glazing.
- Turn the assembly over carefully so the paper faces up. Rub along the back rails to bond the paper to the tape and define the edges.
Turn the supported assembly before trimming. Keeping excess paper on every side gives you room to position the frame without leaving a short edge.
Trim the excess and check the bond
Trim with the frame supported: work around the outside edge with the blade under control, keeping your other hand clear of its path. Cut the excess paper without scoring the frame finish, then lift away the waste strip. Smooth the paper perimeter and check for lifted areas.
The finished paper cover conceals the fitted back and helps limit dust entry. It is not an airtight seal. Finish with appropriate hanging hardware and bumpers for the frame. For the surrounding fitting sequence, use the wood-frame fitting guide.
Understand the cover's job before closing the back
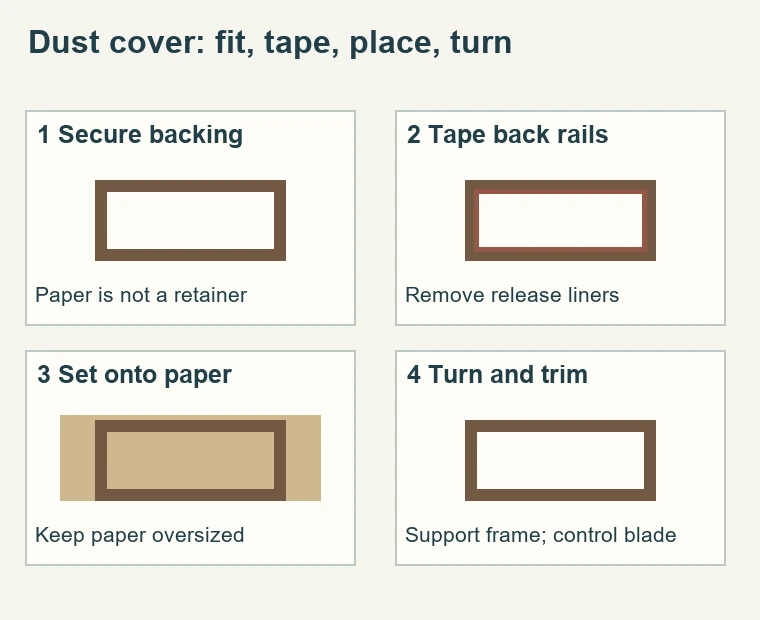
- The paper cover is a finishing layer applied after the artwork package is fitted and retained. It conceals the back opening and helps limit dust entry, but it is not a structural retainer or an airtight enclosure. The tabs or other suitable hardware must already hold the package. If the backing moves, the joints are loose, or the image is misaligned, resolve that before applying paper that makes the work harder to inspect.
- This tape-and-paper method is for a wood frame. Do not assume that every frame profile has the same flat attachment area or that every paper and adhesive is suitable for every artwork. Use the selected materials and assess the actual back rail surfaces before treating this sequence as ready to begin.
- Inspect the front under useful light. Check the image position, mat edges, visible dust, glazing marks, and spacer concealment. Then inspect the back for loose retainers and any component caught above the intended position. This is the useful point to correct an internal issue. A neat paper cover cannot improve the underlying fit and should not be used to hide uncertainty about how the work is retained.
Prepare the frame, paper, and turning space
- Clear enough room to lay the oversized paper flat and turn the whole frame without catching an edge. Protect the finished face when it rests on the table. Remove grit, blades, spare screws, and loose hardware from the turning area. The frame changes orientation during fitting, so a clean spot only large enough for its back is not the complete working space needed.
- Choose paper large enough to extend beyond every side. The excess is intentional: it allows the taped back to land fully on the sheet before trimming establishes the final perimeter. A sheet cut exactly to the outside frame size leaves little opportunity to correct placement. Check the paper for tears or damage before exposing the adhesive so a defective area is not discovered after it is bonded to the rails.
- Keep the intended front and back of the assembly clear in your mind. The frame begins face down for tape application. It is then turned face up so the taped back can be lowered onto the paper. Finally the assembly is turned again to work on the paper-covered back. The orientation changes are part of the method, not incidental movements between unrelated steps.
Establish a clean perimeter bond
- Identify the flat rear surfaces where the cover will attach. Keep the adhesive on those intended surfaces rather than bridging the open center. The paper will span that center after it is bonded at the perimeter. A rail with an unusual profile or existing hardware may require a closer assessment of the available attachment area. Do not create an improvised connection across moving or unsupported components.
- Apply the chosen tape as directed and remove the release liners before bringing the frame onto the paper. Keep discarded liners away from the artwork and exposed adhesive. Work deliberately around the perimeter so no section is missed. If tape becomes dirty or a liner remains trapped, correct it before the paper is attached rather than trying to improve a weak area by pressing harder through the finished cover.
- Do not introduce an unrelated glue as an automatic substitute. Its compatibility, application, and behavior can differ from the selected tape. Likewise, brown paper does not prove archival properties. Verify any material requirement from the selected products. The practical goal is a properly specified perimeter attachment, not simply a paper rectangle that appears to stay on the back temporarily.
Lower and turn the assembly with support
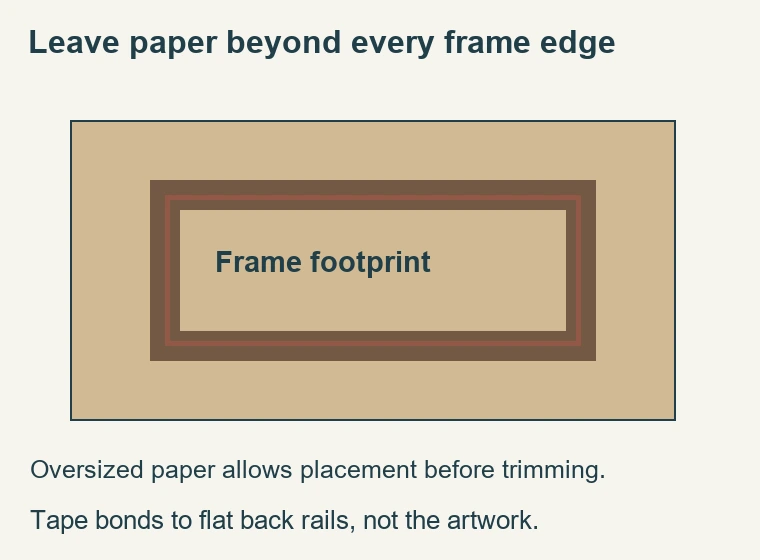
- Lay the paper flat before lifting the frame. Lower the taped back onto it with excess visible on all sides. Keep the frame square enough to leave trimming room around the whole perimeter. Press along the frame rails to establish contact. Do not press on the glazing to force the paper against the tape; the bond is at the back rails, and the pressure should be directed there.
- When turning the assembly paper-side up, support the frame and its contents securely. The artwork should already be retained, but the frame still needs controlled handling. Avoid lifting by the newly attached paper or letting a loose edge snag the bench. Place the front on the clean protected surface and inspect the cover's position before proceeding to the blade step.
- Rub along the perimeter where the tape lies and define the edges as described. Watch for a section that lifts or a fold that prevents an even bond. The paper should cover the opening without being used to pull a distorted frame into shape. If the placement is substantially wrong, follow the material instructions for correction rather than stretching the sheet to conceal a short side.
Trim with the frame finish and your hands clear
- Trim around the supported back perimeter. Keep the blade under control and the other hand away from its path. Cut the excess paper without scoring the moulding. Work from a supported position instead of reaching across an unstable frame. This method does not establish one blade setting or pressure for every paper and profile, so assess the actual material and tool before cutting.
- Lift the waste strip away carefully and inspect the finished edge. Do not pull a partly attached strip hard enough to tear the bonded cover. If the cut is incomplete, correct it with controlled handling. Smooth the perimeter and check the corners for lifted paper. A damaged edge should be addressed before the frame is moved into hanging-hardware work, where additional handling can catch it.
- Keep blade fragments, scraps, and liner pieces away from the finished frame. Check the bench before turning the picture upright. The cover can look complete while a loose sharp item remains nearby. A final clear work area protects both the frame finish and the person completing the next step.
Troubleshoot before adding hanging hardware
After the cover is sound, complete the separate hanging and bumper arrangement for the frame. Check screw locations and available frame material according to that hardware's instructions. The paper should not become the structural attachment for a hanging fitting. Keep the artwork-retention, dust-cover, and hanging tasks distinct even though they all appear on the same back.
Made in the USA
Handcrafted by American framing experts
Family Owned
Serving customers for over 40 years
Premium Shipping
Professionally packaged for safe delivery
Ready to Hang
Hardware included with all frames
Framing Specialists
Over 40 years of custom framing experience
