
Ok

Ok

What is the question
Cancel
PICTURE FRAMES
 CUSTOM PICTURE FRAMES
Design Your Framing Package Online!
Add Mats, Glass & Acrylic, Mounting Board And More.





Search
☰

My Account
Log In
Favorites
Saved Designs
Shopping Cart
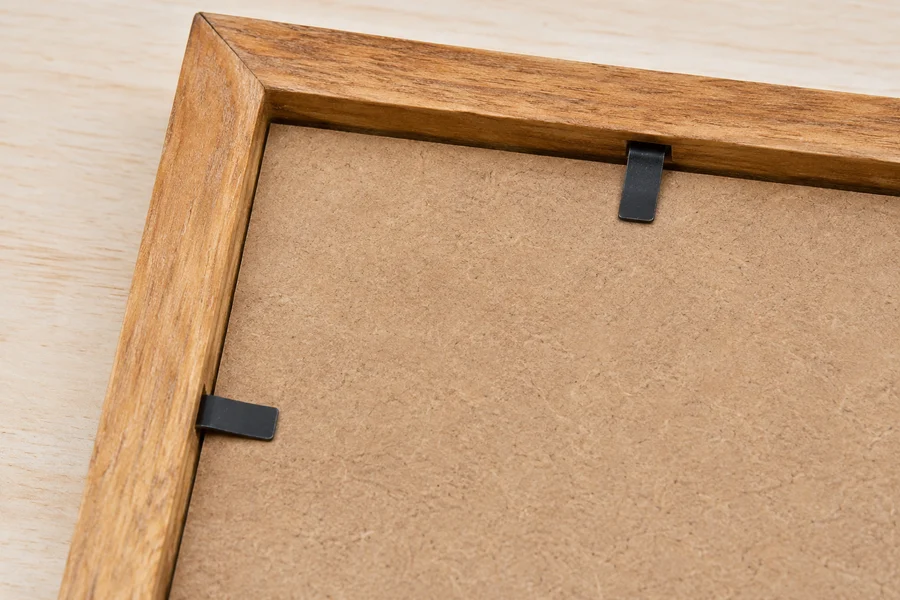
Use the video and the hardware-specific instructions below to retain the artwork package in a wood frame. Start with the hardware supplied for your frame and the actual thickness of its contents.
Watch: art securing hardware explained
Find the demonstrations: 0:34 - Retaining tabs and the backing package; 1:08 - Points and hand-tool insertion; 1:58 - Canvas and step-down clips.
What does art securing hardware do?
It retains the artwork and framing components inside the back of the frame. The video identifies bendable tabs, glazier points, offset clips, and screws; bendable tabs are the usual example. This hardware serves a different purpose from the hanging kit.
How is the hardware depth set?
The position accounts for your artwork's thickness and the other materials ordered with the frame. The video gives these examples:
| Artwork | Depth allowance described |
|---|---|
| Paper-thin art | Set for the ordered acrylic, mats, backing, or glass spacers. |
| 1/8-inch panel | Allow another 1/8 inch beyond the other ordered materials. |
| 3/4-inch stretched canvas, with no other layers | Set the tabs at 3/4 inch. |
Is the hardware installed or supplied separately?
The video explains that hardware requiring a pneumatic point gun, such as bendable tabs, is installed in production. Other securing hardware is supplied for you to position, selected with your depth requirements in mind.
Before installing: check the complete package
The video moves from a backing-board example to a canvas and offset clips. Those packages need different retaining arrangements. The instructions below cover the individual methods, including additional fitting guidance.
- Work with the frame face down on a clean, padded surface, protecting the finish and artwork.
- Check the image orientation and fit. Seat the glazing, mat or spacers, artwork, and backing in their intended order, using only the components your project requires.
- Compare the back of the package with the frame's usable rabbet depth. Is it recessed, flush, or projecting beyond the frame? Hardware must reach the package without forcing it.
- Check the supplied hardware and tools before attaching anything. The methods here concern wood frames; metal-frame channels use different hardware.
When ordering, Art Thickness describes the materials you supply. The designer separately accounts for materials you order from us. Do not count those layers twice. See how to measure usable rabbet depth if the depth relationship is unclear.
How to use preinstalled bendable tabs
A flexible retaining tab enters the inside edge of the wood frame and overlaps the backing. Opening and closing an installed tab is different from driving a new one into the wood.
- Gently lift the free end of each flexible tab clear of the backing. A flat-blade screwdriver can help lift it; keep the tool clear of the glazing and artwork.
- Remove the backing as needed, position the art, then replace the backing and check the front for alignment and dust.
- Bend the tabs back over the backing until the contents are retained. Avoid pressing so hard that the backing bows or the glazing is loaded unevenly.
- Check every side. If a tab cannot reach or the package will not seat, recheck the thickness rather than forcing the tab.
Only flexible tabs are intended to bend this way. Do not treat rigid points as reusable bendable tabs. The opening-and-closing method is also illustrated in Room & Board's flexible-tab instructions (PDF).
How to install new framing points with a driver
New flexible or rigid framing points require a compatible fitting tool or point driver. The video's production explanation concerns the equipment used in our shop; suitable hand-operated drivers also exist for home fitting.
- Choose points approved for your particular driver and load them according to its manual. Select flexible points when you need the bendable type; rigid points do not function the same way.
- With the package seated, rest the driver flat on the backing and bring its nose against the inside wood edge.
- Support the frame and operate the driver as directed. Keep it level so the point enters the wood alongside the backing, rather than angling down and pinching the package.
- Continue around the frame using the tool manufacturer's spacing guidance and the requirements of your package. Check that the backing remains flat and retained.
Do not use an ordinary staple gun as a substitute for a compatible point driver. Consult the Logan point-driver manual (PDF) or your own tool's instructions for loading, adjustment, and spacing. Different tools specify different arrangements.
How to install push-point glaziers
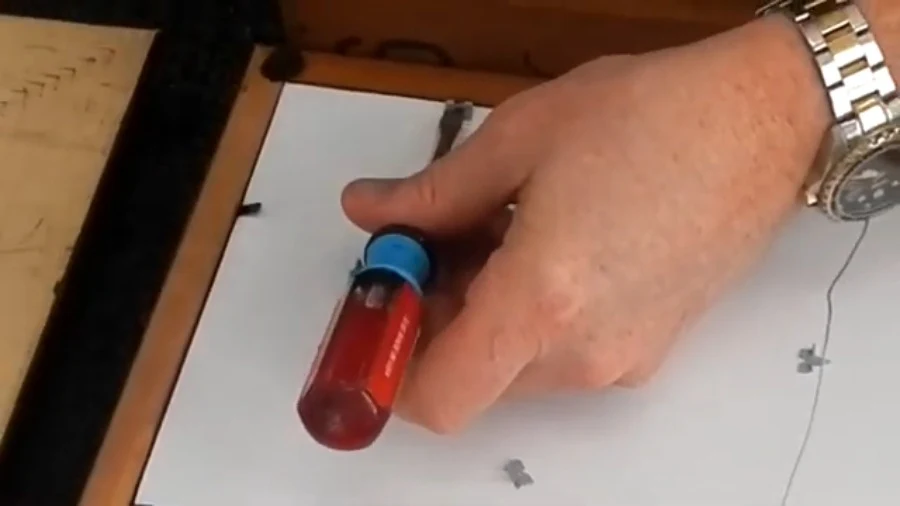
Push points are hand-installed retainers with a sharp end that enters the wood and a shoulder for the tool. The securing-hardware video's tool-and-hammer sequence shows why controlling the insertion direction matters. Our dedicated push-point demonstration provides a closer view of this method.
- Set the point on the backing at the inside edge of the frame, with its sharp end aimed into the wood.
- Use a compatible push-point tool or a broad flat-blade screwdriver that seats securely against the point's shoulder. A narrow tip can slip off.
- Keep your free hand out of the tool's path. Use a protective block against the outside of the frame, as shown in the dedicated demonstration, to protect the finish and help guard against slipping.
- Push into the wood while keeping the point flat against the backing. Do not push downward through the backing or towards the glazing.
- If the wood resists, the dedicated demonstration shows gentle hammer taps to start the point, followed by hand pressure. Do not force a point that bends or cannot enter the wood cleanly.
- Fit the remaining points around the package and confirm retention. The number shown in one example is not a rule for every frame size or material.
How to install offset clips and their screws
An offset clip bridges a difference in depth between the frame's back and the package it retains. The video includes a canvas example. Select the offset for that actual depth difference, rather than choosing it solely from the canvas thickness.
The on-screen step-down clip list shows flush/flat, 1/8, 1/4, 3/8, 1/2, 5/8, 3/4, and 1-inch offsets. These illustrate the available depth relationships in the demonstration; check the clip selected for your order rather than treating the list as a current stock guarantee.
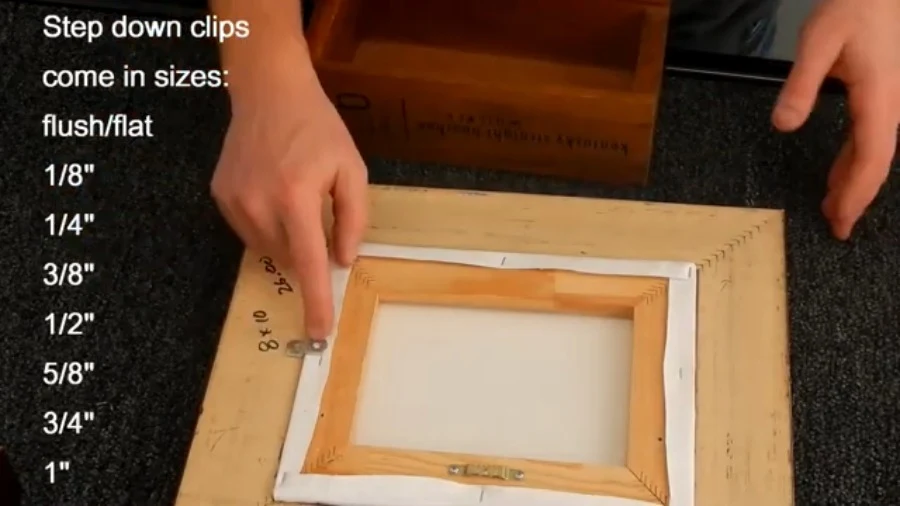
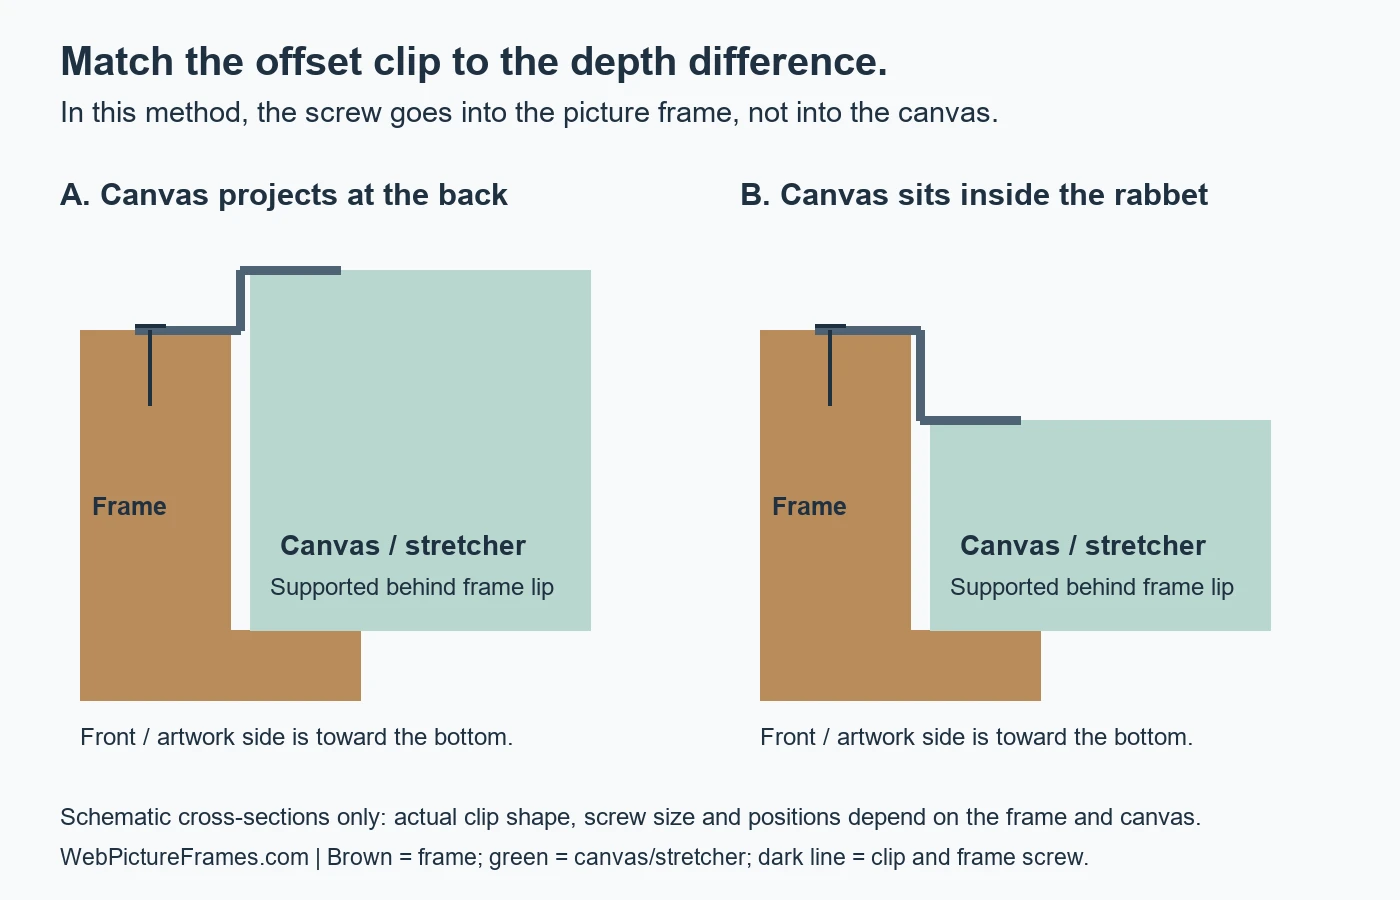
- Seat and align the artwork. Place a clip with its retaining end over the backing or stretcher edge and its screw hole over suitable wood on the picture frame.
- Check the clip's reach and orientation. A projecting package and a recessed one need different arrangements; use the hardware selected for yours.
- Check the screw length against the available frame material at the exact attachment point, allowing for the clip's thickness. The screw tip must not emerge through the front or enter the artwork package.
- Mark and make a suitable pilot hole if required by the screw and wood. Control its depth and keep the drilling path clear of the artwork.
- Install the screw into the picture frame and tighten until the clip is snug. In this retention method, the screw attaches the clip to the frame; do not drive it through the canvas fabric.
- Fit the remaining selected clips around the package, keeping the artwork aligned. Stop short of pressure that bends the backing, distorts the stretcher, or strips the wood.
A screw is a fastener for the chosen retaining arrangement, not a universal way to secure every artwork. There is no single screw length or clip count that fits all frame profiles. For the projecting and recessed canvas methods, see the full wood-frame canvas fitting guide. This is separate from mounting art in a floater frame.
Check the result before adding hanging hardware
| Problem | What to check |
|---|---|
| The package moves or rattles | Check seating, missing retainers, tab depth, and clip engagement. Tightening harder cannot correct the wrong offset. |
| Backing bows or mats buckle | Release excess pressure. Check for points angled down or hardware compressing the package. |
| Tabs cannot close over the package | Recheck total thickness and the hardware depth. Do not crush the contents to make them fit. |
| A point bends or a screw spins | Stop and check tool compatibility, wood condition, and fastener suitability. A damaged attachment needs correction before display. |
Inspect the front for alignment and dust, confirm the backing stays flat, and check every retaining attachment. Then fit the separate hanging hardware. If the supplied retainers cannot engage your package, contact our framing team with the frame and artwork thickness before making changes.
Continue your framing project
Browse art securing hardware. For fitting instructions, see how to fit art into a wood frame or install stretched canvas in a wood frame.
Made in the USA
Handcrafted by American framing experts
Family Owned
Serving customers for over 40 years
Premium Shipping
Professionally packaged for safe delivery
Ready to Hang
Hardware included with all frames
Framing Specialists
Over 40 years of custom framing experience
