
Ok

Ok

What is the question
Cancel
PICTURE FRAMES
 CUSTOM PICTURE FRAMES
Design Your Framing Package Online!
Add Mats, Glass & Acrylic, Mounting Board And More.





Search
☰

My Account
Log In
Favorites
Saved Designs
Shopping Cart
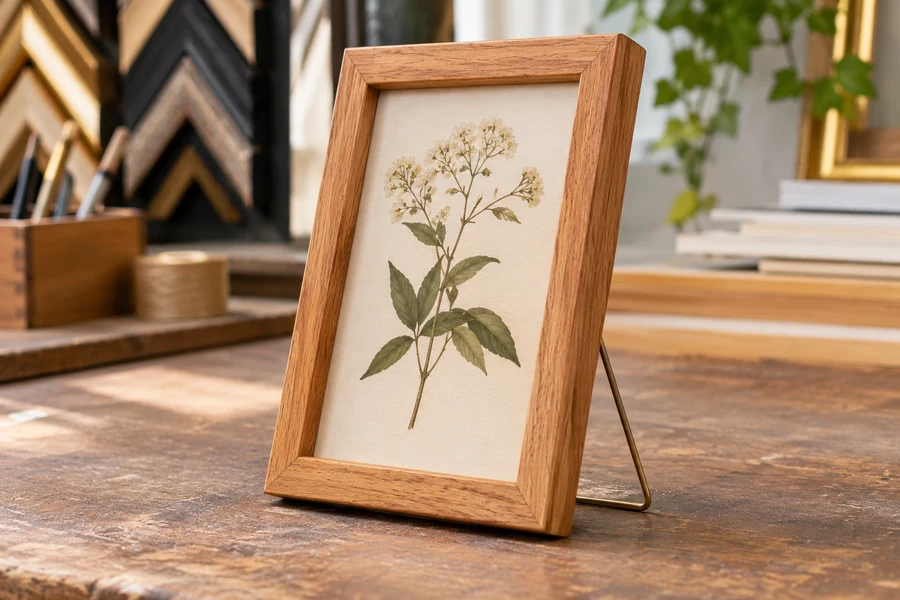
An easel back turns a suitable small frame into a tabletop display. Choose a compatible support, confirm its attachment, and test the completed frame in its standing position.
Watch: How to Install an Easel Back on a Picture Frame
How an easel back supports a frame
A metal-rod easel support holds a compatible small frame upright. It attaches at the bottom of the frame and lets it stand on a desk, shelf, or tabletop. It serves a different job from hanging wire and from the tabs retaining the artwork.
Select an easel by its current compatibility information and test the complete framed load. Dimensions such as 5 x 7, 8 x 10, or 11 x 14 inches describe common small-frame projects; they do not establish a support capacity or guarantee stability.
Easel-back troubleshooting reference
| What you notice | What to check |
|---|---|
| The picture rocks on the table. | Check the level surface, the frame's lower edge, and whether both sides of the support contact the table. |
| The support closes unexpectedly. | Inspect its intended open position and attachment. Do not rely on another object to keep it open. |
| A screw turns without tightening. | Stop using the attachment until the damaged or incompatible fixing is assessed. A larger screw may create a new clearance problem. |
| The support catches the backing. | Confirm the correct mounting position and that the package is fully seated and retained. |
| The frame needs an extreme lean to balance. | Recheck compatibility, weight, orientation, and surface depth instead of reshaping the hardware. |
Choose the standing orientation
- Decide whether the picture will stand in portrait or landscape orientation before choosing the support position.
- Check the complete frame's weight, outside size, and back profile against the easel hardware's instructions.
- Check that the support can open behind the frame and contact the display surface without interfering with the backing or other hardware.
Mounting position depends on the compatible support and frame profile. Check the actual attachment area and follow the hardware instructions before drilling.
Attach the support to the compatible frame
The metal easel backs described come with attachment screws. Use the mounting arrangement intended for your frame material. A screw mounted in wood and hardware fitted to a metal-frame channel require their own compatible attachments.
- Lay the frame face down on a clean, protected surface. Position the easel according to its instructions and check its opening direction.
- For a screw-mounted wood-frame support, check the screw path and available wood thickness. The screw must not emerge through the front or enter the artwork package.
- Attach with the supplied compatible hardware, using controlled pilot-hole depth where required. Tighten the attachment securely without stripping the wood.
- Open the support and stand the completed frame on a level surface. Confirm that both the frame and support make steady contact.
Check stability before display
The frame should stand without rocking or relying on another object to stay upright. Leave space behind it for the open support. If the frame is too large, too heavy, or unstable, choose another compatible display method rather than forcing the easel farther open.
For a wall display, see picture frame hanging hardware. For the separate task of holding the picture inside the frame, see art securing hardware.
Plan the complete tabletop display
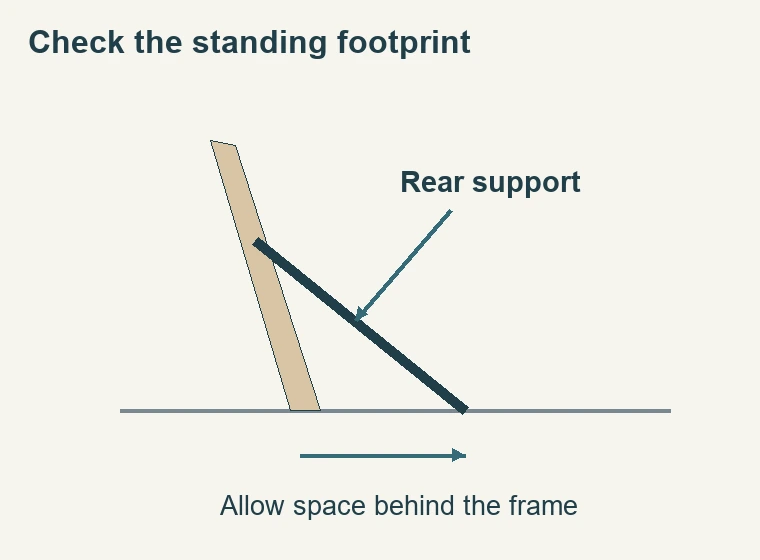
- Choose the support for the finished assembly and its intended standing position. Start with the completed frame rather than the empty moulding: glazing, backing, mats, and the artwork change the load. A support that seems adequate while the frame is empty may behave differently once the complete package is fitted. Do the final standing check with everything installed.
- Measure the available shelf or desk as well as the picture. A standing frame occupies space behind its lower edge because the support opens backwards. That footprint matters on a narrow mantel, a shallow bookcase, or a desk against a wall. Do not choose a position where the support must hang beyond the edge or remain partly closed to fit. Move the picture to a deeper surface or choose a different compatible display arrangement.
- Think about the normal viewing position. A frame placed on a high shelf and viewed from below needs a different assessment from one placed beside a computer monitor. Set the frame in the intended location before making a permanent attachment when the hardware allows that check. Look for glare, an awkward lean, and contact with nearby objects. Adjust the display location rather than bending hardware beyond its intended shape to force a preferred angle.
Evaluate the attachment area before drilling
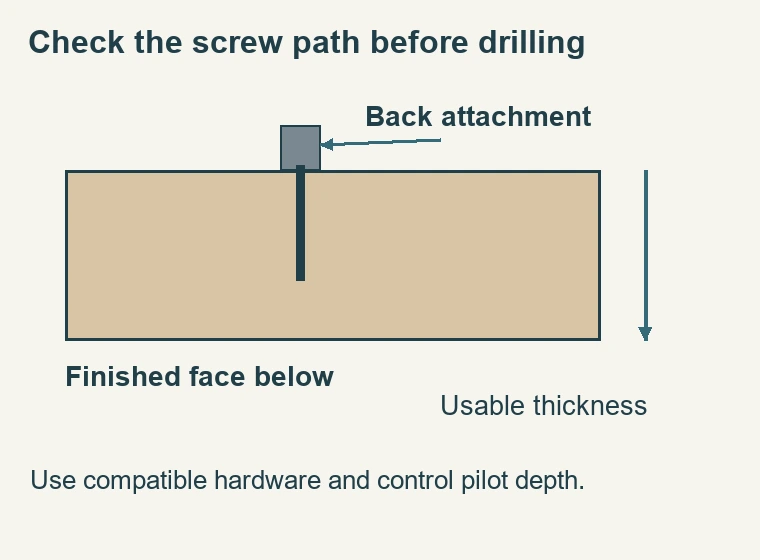
- The wooden frame is the load-bearing structure in a screw-mounted arrangement. Backing board closes the artwork package; it is not automatically a structural mounting surface for an easel. Identify exactly where the supplied bracket or rod is designed to attach. If the proposed screw lands over a backing panel, a thin decorative edge, or the artwork opening, stop and check the support's fitting instructions. Do not assume an attractive-looking attachment point is physically suitable.
- Inspect the back of the lower rail for existing hardware, joints, and changes in profile. A rail can look broad from the front while having little usable material where a screw would enter. Check the actual wood available along the screw's path. Overall moulding height and usable attachment thickness are different measurements. Pilot-hole size and distance from the corner must come from the compatible hardware and frame construction.
- For a metal frame, first identify its channel and the attachment designed for that channel. A wood screw is not a general substitute for a channel fitting. Likewise, a part that slides into one metal profile does not establish compatibility with every metal frame. Keep the support's mounting parts together and confirm how they lock before putting the artwork at risk. If a required fitting is missing, obtain the correct part instead of improvising an attachment through the backing.
- Where drilling is required, protect the finished face and establish the maximum safe depth before starting. Consider the drill tip as well as the intended screw length. A pilot hole that is deeper than necessary can damage a shallow rail even when the screw itself would have been short enough. Keep the frame supported on a clean padded surface and control the tool so it cannot slip into the glazing or artwork package.
Check portrait and landscape positions separately
- Turning a frame through ninety degrees changes which rail becomes its base and where the easel must act. Do not assume that hardware installed for portrait display will also support landscape display. Some supports are designed to accommodate both orientations; others depend on a particular mounting position. Follow the actual support's arrangement, then test the finished frame in every orientation you intend to use. Compatibility in one position does not establish compatibility in another.
- Centering the support visually is a useful starting consideration, but it is not a substitute for testing the actual assembly. A frame with an unusual profile, a decorative extension, or additional components can behave differently from a plain rectangle. Look at the contact points: the base of the frame should rest evenly, and the open support should meet the surface without twisting. A frame that rocks when lightly touched needs correction before it is left standing.
- If the display will be moved regularly, make the opening and closing action part of the check. The support should fold without scraping the backing or catching hanging wire. Do not let loose screws, spare fittings, or packaging remain trapped behind it. When moving the picture, hold the frame securely rather than lifting by the easel rod. The support is a standing component; it is not automatically a carrying handle.
Troubleshoot a frame that will not stand securely
A useful test is to separate a location problem from an attachment problem. Try the completed frame on a clear, level work surface before testing the final shelf. If it stands properly on the bench but not on the shelf, inspect the display surface and available footprint. If it remains unstable on the bench, revisit the hardware and frame compatibility. That sequence avoids repeatedly changing an attachment when the real issue is an unsuitable display location.
Questions to settle before leaving the frame on display
Can a wall-hanging kit act as an easel?
Hanging wire, D-rings, and related wall fittings hold a frame in a different way. They do not provide the rear contact point required for a standing display. Choose the hardware for the intended use and keep its job separate from the tabs or points that retain the artwork. Having several pieces of metal on the back does not mean one component can safely replace another.
Does a small frame always need only a small support?
Outside dimensions alone do not establish the load or balance. A substantial moulding and a glazed package can weigh more than another frame of the same artwork size. Use the supplied support's compatibility information and assess the finished assembly. Confirm the selected support's current frame-size and weight guidance; there is no universal capacity for every easel.
What should be checked after the picture is changed?
Recheck the retaining hardware, the easel attachment, and the standing position whenever the package is opened. A change in glazing, backing, or orientation can affect the finished display. Confirm that the support still clears the new package and that all attachments remain secure. Then test the frame in its final location before leaving it unattended. A previously successful setup should be checked again after a meaningful change.
Made in the USA
Handcrafted by American framing experts
Family Owned
Serving customers for over 40 years
Premium Shipping
Professionally packaged for safe delivery
Ready to Hang
Hardware included with all frames
Framing Specialists
Over 40 years of custom framing experience
