
Ok

Ok

What is the question
Cancel
PICTURE FRAMES
 CUSTOM PICTURE FRAMES
Design Your Framing Package Online!
Add Mats, Glass & Acrylic, Mounting Board And More.





Search
☰

My Account
Log In
Favorites
Saved Designs
Shopping Cart
Museum Glass combines reduced reflections with up to 99 percent UV blocking. Compare available glazing, plan the mat and backing package, and follow the fitting and cleaning steps below.
Watch: Museum Glass for Picture Frames Explained
Anti-reflective viewing and UV protection
Museum Glass combines an anti-reflective surface with up to 99 percent UV blocking. Choose it when the project calls for both reduced reflections and conservation UV protection. These benefits address different needs:
- Clearer viewing: the anti-reflective surface reduces distracting reflections across the image.
- UV filtering: the protective coating reduces UV exposure reaching the artwork. It does not prevent all light-related change or make direct sunlight suitable for sensitive work.
- A complete framing package: the pane still needs appropriate mats, backing, mounting, and separation from the artwork.
Compare Museum Glass with the available alternatives
| Option | Material and view | Useful comparison |
|---|---|---|
| Museum Glass | Anti-reflective glass with up to 99 percent UV protection. | Choose when reduced reflections and conservation UV filtering are both required. |
| Anti-Reflective Glass | Custom-cut anti-reflective glass; the listed product is not the conservation UV-filtering option. | Compare when reflection reduction is the priority; check the artwork's protection requirements. |
| Optium Museum Acrylic | Coated acrylic with its stated anti-reflective, anti-static, abrasion-resistant, and UV features. | Compare when acrylic handling or that feature combination is needed. |
| All glass and acrylic options | The collection contains the currently offered glass and acrylic glazing choices. | Compare materials and product specifications before selecting your cut size. |
Identify the artwork-facing side before fitting
Use the supplied markings to identify the UV-coated side. Wording indicating that a side faces the artwork identifies its required orientation. Follow Tru Vue's current care and handling instructions if the marking or packaging needs clarification.
- Confirm the pane. Check the ordered product, cut size, condition, and orientation before placing it in the frame.
- Prepare the surface. Keep the glass on a clean, non-abrasive support while inspecting or cleaning it.
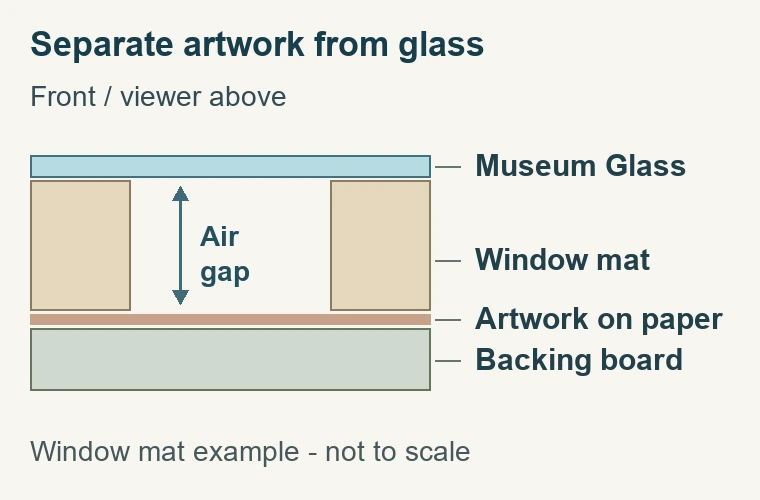
- Keep artwork separate. Use an appropriate window mat or glass spacers so the image does not rest against the glazing.
- Retain without forcing. Seat the complete package evenly; a tight or distorted frame is a fitting problem to correct before closing the back.
Clean Museum Glass in four steps
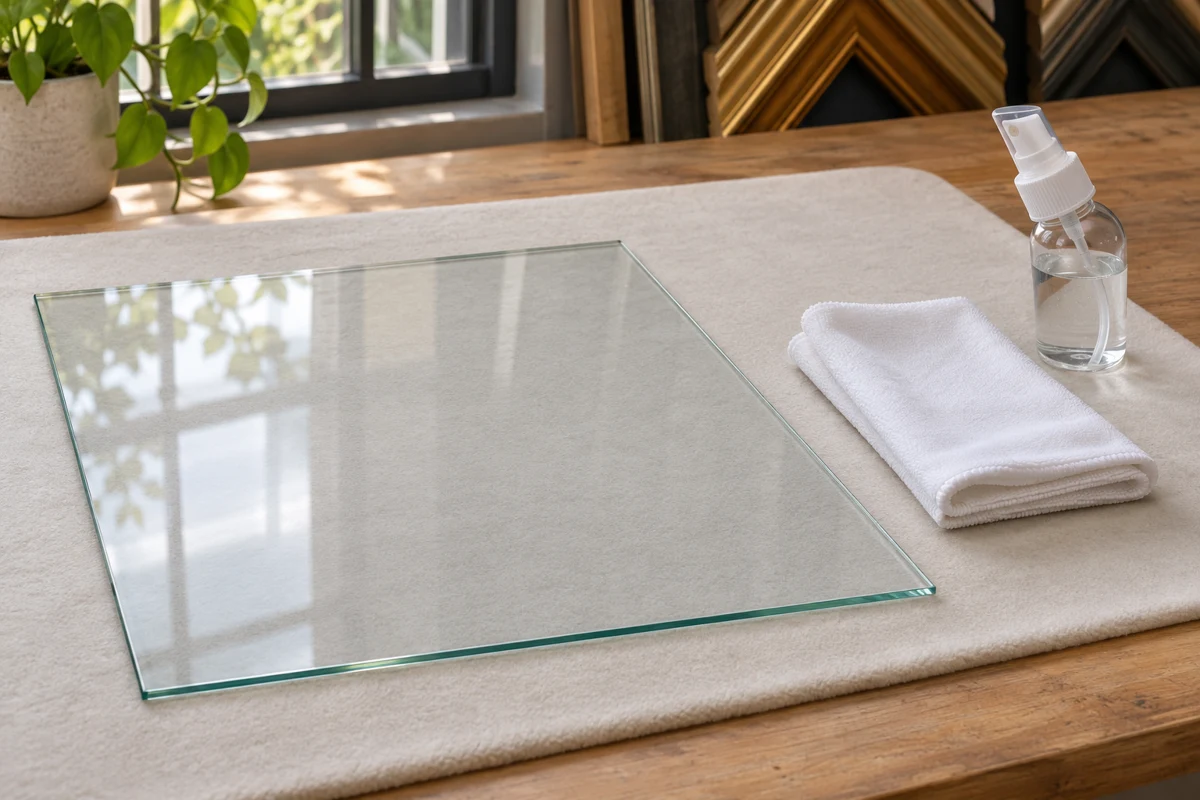
- Check whether cleaning is needed. Inspect the surface and remove loose grit without dragging it across the pane. Use clean materials and a non-abrasive work surface.
- Dampen the cloth. Apply a small amount of suitable ammonia-free glass cleaner to a clean microfiber cloth, rather than spraying the glass or framed artwork.
- Clean carefully. Follow the product's care instructions, keeping abrasive materials away from the coated surface. Do not attempt to polish out a scratch.
- Inspect before fitting. Check for remaining marks and debris. If a mark persists, identify its cause before trying another cleaner or rubbing harder.
If lighter weight and break resistance matter to the project, compare Optium Museum Acrylic. Use the glass-selection guide for additional explanation before selecting from the glass and acrylic collection.
Specify the two main benefits independently
- Separate the requirements. Museum Glass combines anti-reflective viewing and conservation UV protection. Those benefits solve different problems. One concerns how the viewer sees the image through and around surface reflections; the other concerns part of the light exposure reaching the work. Keep both requirements explicit when choosing or replacing the pane.
- Keep the specification. A pane described informally as museum glass is not necessarily the same supplied product. A glazing choice also does not complete the entire preservation plan. Identify the exact item and its current documentation. Keep its name, dimensions, thickness, orientation information, and care instructions with the framing order so its specification can be verified later.
- Start with the artwork. Begin with the artwork and display brief. Consider the medium where known, its condition, the planned mounting, the required separation, the room reflections, and the expected transport. The combined properties are useful when they answer those requirements. Avoid choosing solely from a generalized quality label or assuming that the word museum makes every mat, backing board, adhesive, and display location appropriate.
Supply the care record when the frame moves
Keep a short care record with artwork that is gifted, sold, transported, or serviced elsewhere. Include:
- Glazing identity: the ordered product name, dimensions, and supplied care instructions. Another person should not need to infer the coating from a reflection.
- Package details: the selected archival mat, backing board, mounting method, and separation arrangement.
- Replacement requirements: record both reflection and UV needs so a future replacement matches the specification, rather than merely resembling a clear pane.
Check the view of the image and the reflected room
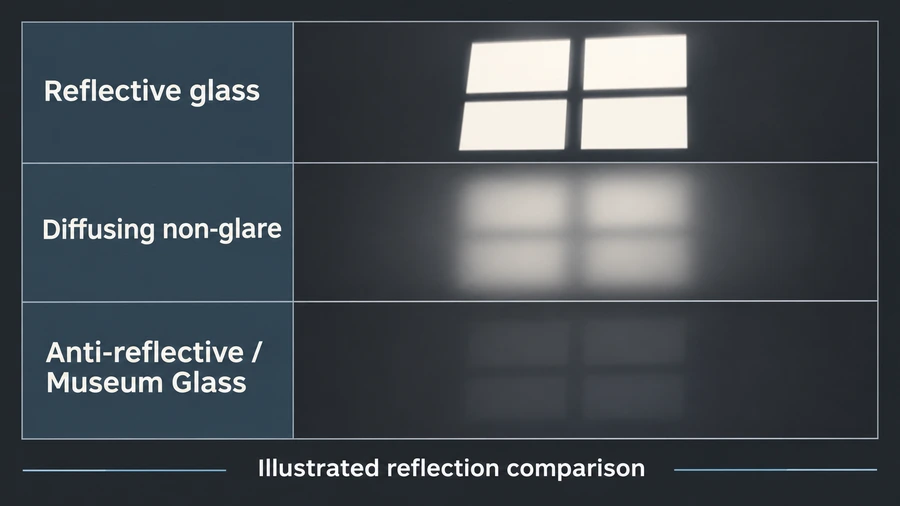
- Set up a useful comparison. Compare samples over artwork with the detail and contrast of the actual project. Look at fine lines, text, and dark image areas as well as bright regions. A surface reflection may be much more visible over one part of an image than another. Use the intended mat or glass spacers to reproduce the separation in the package that will be fitted.
- Keep the test conditions equal. Include a regular clear sample and a diffusing non-glare sample where useful. Their reflected appearances differ. A coated anti-reflective view is not simply the same texture with a different protection percentage. Compare the actual image clarity and room reflection at the same angle, distance, and separation. That is a fairer test than comparing two photographs taken under unrelated lighting.
- Check the intended room. Check the intended room and normal viewing positions. An anti-reflective pane is not a claim that no reflection can be found at any angle. Decide whether the remaining appearance is acceptable during normal use. If a bright light still crosses the image, consider moving the light or picture as well as assessing the pane. Glazing and room layout can work together to improve viewing.
Build the conservation package around the work
- Select contact materials. If the work requires archival contact materials, choose custom archival picture mats and verify the backing and mounting materials separately. A protective pane at the front does not establish the suitability of an unidentified board behind the image. Record the selected components rather than relying on the broad phrase conservation framing. The actual materials and attachment method are what a future fitter or conservator will need to understand.
- Support the artwork. Plan artwork support separately from the window mat. The mat defines a visible opening and can help provide separation, but it does not automatically attach the work. Choose a method appropriate to the artwork and any requirement for future removal. Do not rely on compressing the paper between pane and backing to keep it aligned, and do not assume that any adhesive used with a conservation mat becomes suitable.
- Manage light exposure. Manage display conditions too. UV protection does not stop all light-related change. A low-reflection view can make an image easier to see without making direct sunlight appropriate for sensitive work. Consider the location and exposure, and seek specialist advice where the artwork's value, medium, or condition requires it. The glazing supports a plan; it does not replace one.
Check depth, size, and glass handling before assembly
- Measure the receiving space. Confirm the receiving dimensions using the designer's instructions or the actual frame. The pane size is distinct from the visible window and the outside moulding dimensions. If the artwork is matted, the package may be larger than the image. Follow the supplier's allowance convention and record the final ordered size rather than keeping only the original artwork measurement.
- Add the package thicknesses. Include actual glass thickness with mats, artwork support, backing, and spacers when checking the usable rabbet. Assess the final back position and retaining method. A frame profile can look substantial while having limited internal depth. Do not omit a required component or force the stack to preserve a moulding chosen before the complete package was considered.
- Plan glass handling. Account for the physical handling properties of glass. The coating does not make the sheet unbreakable or turn it into a lighter acrylic product. Support the pane appropriately and plan the completed frame's movement and hanging. If lower glazing weight or different breakage behavior is an important requirement, compare the acrylic options in the glass and acrylic collection rather than treating the two materials as interchangeable.
Avoid orientation and surface-care mistakes
- Keep the pane identified. Identify the artwork-facing side from the supplied markings and current instructions before fitting. Keep that orientation clear while the pane is cleaned and moved. If working with several pieces, keep their product information associated with the right sheets. A cut pane should not lose its identity simply because it has been separated from the original packaging.
- Resolve uncertainty before fitting. Do not deliberately scratch the pane to identify a coating. Use markings and supplier guidance. If an unmarked piece remains uncertain, obtain reliable identification before completing the frame. This avoids both damaging the pane and making a protection claim based on an unreliable visual guess.
- Protect the coating. Use the specified care method and clean materials. Keep the pane away from grit, loose hardware, and abrasive work surfaces. A coated surface still needs careful handling. If a mark remains after appropriate cleaning, identify its cause rather than escalating to an unrelated solvent or polish. Follow the actual product's guidance so a cleaning attempt does not become a surface-altering experiment.
Inspect the finished frame before closing the back
- Verify the pane's product, dimensions, condition, and side orientation.
- Confirm the intended spacer or mat separation and supported artwork position.
- Check both glazing surfaces and the artwork for visible debris before assembly.
- Inspect the front with the package seated but still easy to reopen.
- Install the correct retainers without distorting the stack and inspect again.
- Finish the back and assess the completed picture in its display location.
If the final inspection reveals a problem
If a mat or spacer edge becomes visible after retention, revisit alignment and fit. If the image appears wrong only in the room, compare reflections and viewing geometry. Those are different corrections. A premium pane does not prevent a fitting error, and a fitting adjustment does not change a pane's protection specification. Identify the actual problem before changing components.
Record the finished package
Keep the final product and care record with the artwork. Include the mat and backing selections, mounting notes, and any display advice. A future replacement should reproduce the required features, not merely the look of a clear pane. This is especially important when different glass products can appear similar under one lighting condition while providing different documented properties.
Confirm what the order includes
When reviewing a quote, compare the same size, required features, and package scope. Confirm whether the price covers only glazing or includes other components and fitting. Check the available sheet sizes and order options for custom-cut Museum Glass before placing the order. Check mounting, backing boards, retainers, and hanging hardware separately; selecting glazing does not establish that those components are included. A complete order makes those responsibilities clear before the frame arrives.
The practical result should be a clear, low-reflection view and the verified protection selected for the artwork, within a well-fitted and documented package. If another material supplies the required features more appropriately for the size or handling plan, compare it deliberately. Choose by the actual project and current specification rather than by a generalized ranking of glazing names.
Made in the USA
Handcrafted by American framing experts
Family Owned
Serving customers for over 40 years
Premium Shipping
Professionally packaged for safe delivery
Ready to Hang
Hardware included with all frames
Framing Specialists
Over 40 years of custom framing experience
