
Ok

Ok

What is the question
Cancel
PICTURE FRAMES
 CUSTOM PICTURE FRAMES
Design Your Framing Package Online!
Add Mats, Glass & Acrylic, Mounting Board And More.





Search
☰

My Account
Log In
Favorites
Saved Designs
Shopping Cart
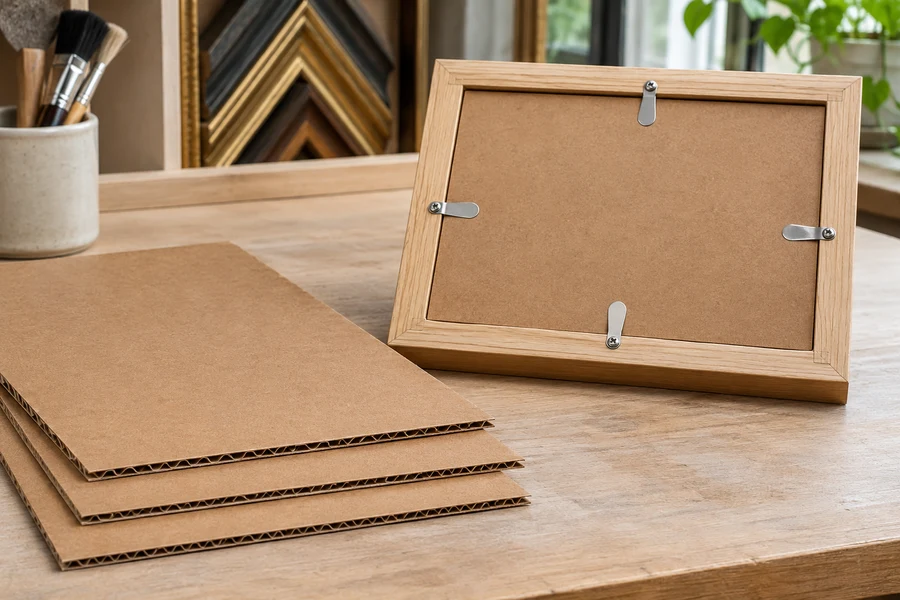
Corrugated cardboard backing is an option for suitable economical projects. Confirm the actual board construction, support, and artwork-contact requirements before choosing it.
Watch: Cardboard Backing for Picture Frames
Assess the economical backing option
Corrugated cardboard is a backing option for suitable economical projects, but a generic cardboard description does not establish an acid-free or conservation specification.
The currently linked corrugated backing is a different material choice from acid-free foam board or archival matboard. Choose the material to suit the artwork, rather than choosing solely because its thickness fits.
Compare backing choices by the requirement
| Material | What the guide establishes | Question to settle |
|---|---|---|
| Corrugated cardboard | The linked economical backing construction. | Does its verified specification meet this artwork's needs? |
| Acid-free foam board | A separately specified contact-material option. | Which thickness provides the required support and fit? |
| Acid-free matboard | A thin contact sheet with different stiffness. | Is a separate rigid support required? |
| Packing cardboard | Protects a shipment in an outer packaging role. | Do not assume that role establishes artwork-contact suitability. |
Check thickness, stiffness, and artwork contact
- Identify the actual board construction and specification.
- Confirm the outside dimensions and whether the board stays adequately flat at that size.
- Include its thickness in the full framing package.
- Decide whether the artwork requires an acid-free support instead.
For irreplaceable work or sensitive paper, compare a verified acid-free backing. Do not assume a brown, white, thin, or thick board has particular conservation properties without its specification.
Fit without treating the board as a mount
Seat the backing behind the artwork and check the retaining hardware's engagement. Backing does not automatically provide an appropriate adhesive or hinge for holding the image in position. Select that attachment separately.
View corrugated cardboard backing cut to size or compare all backing-board choices.
Identify the board rather than relying on the word cardboard
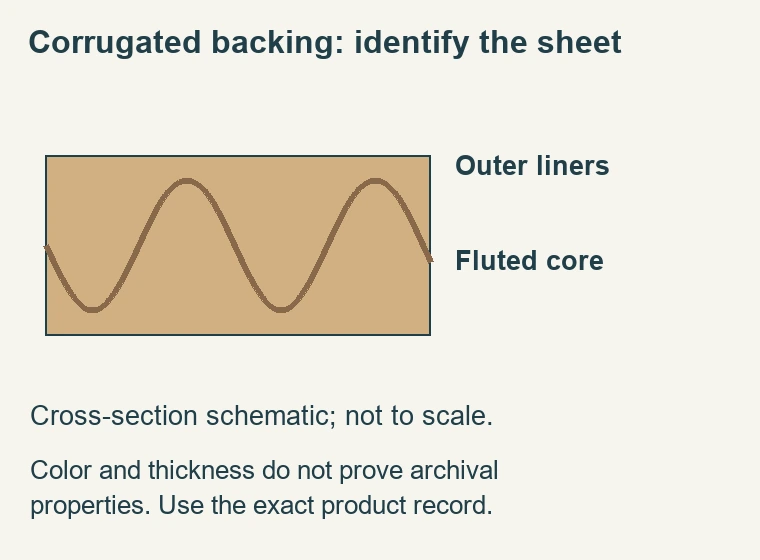
- Cardboard is a broad description rather than a complete specification. The currently linked item is corrugated backing cut to size. Other sheets described casually as cardboard can have different thicknesses, faces, stiffness, or material properties. Confirm the actual construction before selecting it for a picture frame.
- Assess whether the board's physical support and verified properties fit the actual artwork. A board being inexpensive, brown, or readily available does not answer those questions by itself.
- Look at the edge to understand the structure, then read the product description to verify what that structure means for the order. A visible corrugation is a physical observation, not evidence of archival suitability. If the work requires an acid-free contact material, choose a product that verifies that property. Do not substitute a visual inspection for a specification that cannot be established from appearance.
Keep display and packing offcuts identified
Store any reusable board with its source information and intended role. A clean offcut from shipping protection should not become an artwork-contact sheet by accident. Likewise, a specified framing backing should not lose its identity in a pile of similar brown material. If the relevant properties are unknown later, treat them as unknown and choose a verified alternative where the artwork requires one. This prevents a convenient spare sheet from acquiring an unsupported material claim during a future repair.
Choose the project before choosing the lowest-cost sheet
- Consider the artwork's significance, condition, and intended use. A replaceable temporary display and an irreplaceable family document can have different material requirements. Make that distinction before comparing prices. The decision should be based on what the package must do for the work, not on the assumption that all backing sheets are interchangeable because the front will hide them.
- Economical backing can be assessed for suitable projects without making unsupported promises. Verify that it provides the required support at the actual size and that its contact properties meet the brief. If those properties are not documented, treat them as unknown. Do not label an unidentified sheet conservation board merely because a separate mat or glazing component has a protective specification.
- Keep packing material separate from display material. A clean cardboard sheet used around a bagged frame during shipping performs a different job from a sheet placed against artwork for long-term display. Its success as an outer protective layer does not establish that it is suitable for contact with the image. Identify which role is being discussed before transferring advice from one process to the other.
Assess stiffness, condition, and receiving size
- Evaluate the complete sheet at its intended dimensions. The behavior of a small hand-held sample does not establish a maximum unsupported size or prove that every larger sheet stays flat. Consider how the frame supports the perimeter and how the artwork is mounted. If the backing lacks the required stiffness, compare a different construction rather than relying on more retaining pressure to make it rigid.
- Inspect for bends, crushed edges, torn faces, dirt, or other damage before fitting. Reused packaging can have a history that is not obvious from one clean-looking area. Do not assume that a piece cut from a box is equivalent to the specified board in a framing order. The exact material and condition should be known for the intended project.
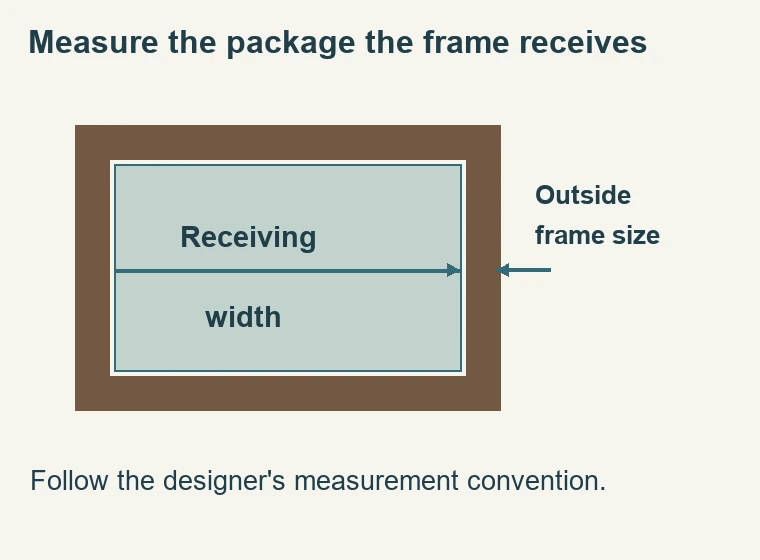
- Measure the required outside backing size from the package or current designer convention. The visible artwork window is not the same reference. A mat can enlarge the complete package beyond the paper image, while the outside moulding adds another dimension again. Keep those rectangles separate so an economical material choice does not become a basic sizing error.
Include thickness in the complete frame-depth calculation
- The linked product is described as an eighth-inch corrugated backing. Use the actual supplied specification when calculating fit. Include glazing, mats, artwork support, backing, and any spacers. Compare the intended arrangement with the usable rabbet, not the moulding's overall height. A shallow frame can reject an otherwise correctly sized board because width and height do not establish depth compatibility.
- Check the final back position before selecting retainers. Points, tabs, and offset clips suit different arrangements and must be appropriate to the frame and package. Do not force the board downwards to reach a retainer that was chosen for a thinner stack. If the package is too deep, revise the frame or component selection coherently rather than compressing the backing until it appears to fit.
- A thinner alternative also needs its own support assessment. Saving depth is useful only if the resulting package still serves the artwork. Conversely, adding another support layer increases the total thickness and may remove the apparent advantage. Decide the complete construction before ordering the moulding so the frame is selected around actual requirements rather than a partial list of components.
Plan artwork attachment independently
- Backing closes and supports the package; it does not automatically provide a suitable way to attach the artwork. Determine how the image will remain positioned and whether it needs future removal. Do not assume that any tape or glue applied to a backing is acceptable because the board itself was sold for framing. The attachment materials and method need their own assessment.
- A window mat can overlap the artwork edges while still requiring a planned mounting arrangement behind it. An unmatted design also needs support and the required separation from glazing. Tight pressure between glass and backing should not be treated as a substitute for those decisions. The picture may appear located initially while an important part of the package remains unspecified.
- If the work is valuable, damaged, or unfamiliar, obtain appropriate framing or conservation advice before introducing an unidentified material or adhesive. An economical board choice does not establish a treatment for sensitive paper. A verified acid-free board may be the appropriate comparison, but even that choice must be paired with a suitable attachment and the rest of the required package.
Fit and inspect before covering the back
- Verify the ordered construction, dimensions, thickness, and relevant material properties.
- Inspect the sheet on a clean surface and remove cutting debris from the work area.
- Confirm the artwork attachment and all required contact layers.
- Seat the backing without buckling, crushing, or forcing its edges.
- Install compatible retaining hardware for the actual back position.
- Inspect the front for alignment, visible edges, and debris before adding a finishing cover.
If the board will not lie evenly, identify the cause before closing the retainers. It may be oversized, damaged, or catching a component beneath it. More pressure can conceal the symptom while distorting the package. Correct the fit while the work is accessible. A paper dust cover is a finishing component and cannot make a poorly seated backing or loose retainer perform correctly.
When an old frame is reopened, reassess the backing rather than copying it automatically. The old material may not meet the current artwork requirements, and its dimensions may reflect an earlier error. A new mat or pane can also change the depth. Use the opportunity to record what is present and decide what should be retained, replaced, or specified more clearly.
Compare alternatives by the requirement that is missing
- If contact suitability is unknown, compare a verified acid-free support rather than guessing about the cardboard. If stiffness is inadequate, assess another construction at the required size. If depth is limited, compare thinner options while checking their support. If a dark exposed back is wanted, evaluate color as a separate feature. Naming the unresolved requirement makes the comparison more useful than ranking boards by cost or thickness alone.
- Keep the final board identity, size, thickness, attachment method, and retaining arrangement with the order record. Confirm which other components are included and which remain to be supplied. The useful result is a backing selected for a clearly defined project, with its known properties and limitations understood. The completed frame should provide the verified, correctly fitted package.
Made in the USA
Handcrafted by American framing experts
Family Owned
Serving customers for over 40 years
Premium Shipping
Professionally packaged for safe delivery
Ready to Hang
Hardware included with all frames
Framing Specialists
Over 40 years of custom framing experience
