
Ok

Ok

What is the question
Cancel
PICTURE FRAMES
 CUSTOM PICTURE FRAMES
Design Your Framing Package Online!
Add Mats, Glass & Acrylic, Mounting Board And More.





Search
☰

My Account
Log In
Favorites
Saved Designs
Shopping Cart
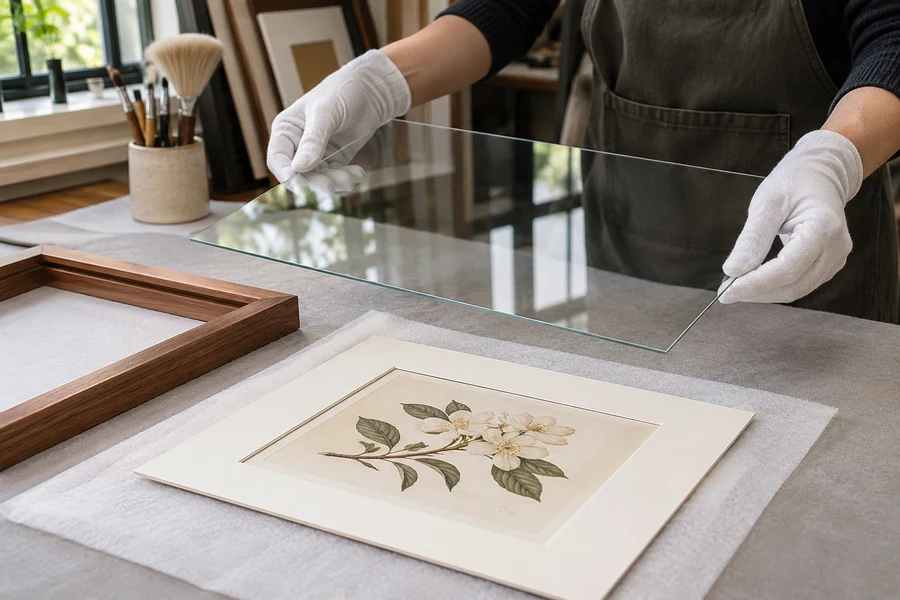
Conservation Clear combines a clear, reflective appearance with UV filtering. Identify the pane from its current markings and documentation before fitting it.
Watch: Conservation Clear UV Glass Explained
Clear appearance with UV filtering
Regular and conservation clear glass can look similar even though their protective specifications differ. Conservation Clear is the UV-filtering clear-glass category discussed here.
UV filtering does not remove mirror-like room reflections and does not prevent all light-related deterioration. Compare Museum Glass if the project also needs an anti-reflective surface.
Conservation Clear fitting checks at a glance
| Check | What to do | Avoid |
|---|---|---|
| Product identity | Retain the exact current product information. | Assigning UV properties to an unidentified clear pane. |
| Orientation | Use supplied markings and instructions for the artwork-facing side. | Scratching the viewing area to guess the coating. |
| Reflection | Test the clear view in the actual room. | Assuming UV filtering also removes reflections. |
| Package | Plan separation, suitable contact materials, backing, and retention. | Treating the glazing as a complete mounting or preservation system. |
Identify the side facing the artwork
Start with current product markings and instructions for coating orientation. Do not deliberately scratch the surface to identify it.
Tru Vue's handling instructions identify the UV-coated side with inkjet wording stating that the side faces the artwork. Check those markings before cleaning or fitting, and keep the coated side oriented as specified. Ask the supplier if an unmarked cut piece cannot be identified reliably.
Fit the glass without loading the artwork
- Handle the glass by its edges on a clean, protected surface.
- Confirm orientation and the required size before assembling the package.
- Provide appropriate artwork separation with a mat or spacers.
- Retain the completed package without excessive pressure on the glass.
Choose by the exact product specification and current availability. Review the glass guide, or compare UV-filtering clear acrylic when weight or break resistance changes the decision.
Conservation Clear is covered here for identification and fitting reference. The current glass and acrylic collection does not list that glass product. For a currently offered conservation glass option, compare Museum Glass, which adds an anti-reflective viewing surface. For clear UV-filtering acrylic, review ACRYLITE OP3. These alternatives have different material or viewing properties; confirm those differences rather than ordering by a similar-sounding category name alone.
Identify the supplied glass before fitting it
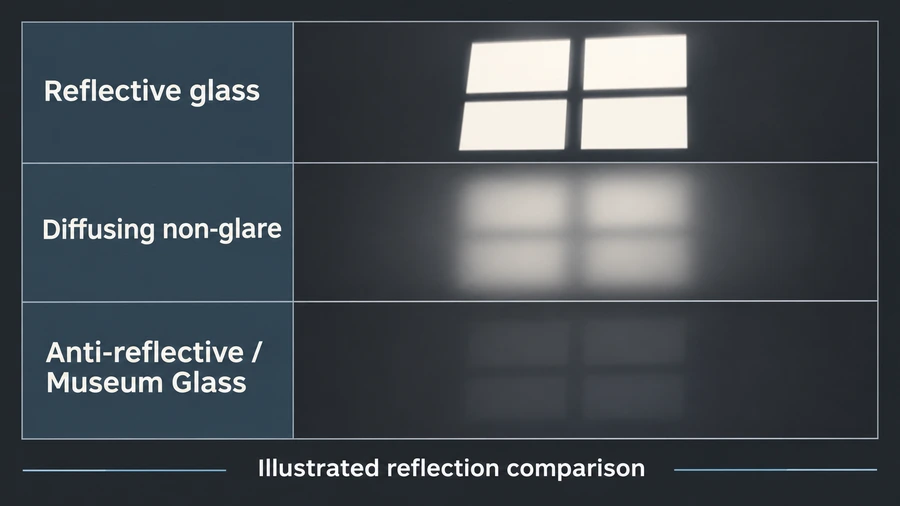
- Conservation Clear is a clear, UV-filtering glass category. Its surface can look similar to regular glass under the same lighting, which is why visual appearance alone is not an adequate product identification method. Keep the supplier's information with the pane and confirm what was actually ordered. Do not assign a protective specification to an unmarked spare piece merely because it looks clear and reflective.
- Conservation glass from different sources does not necessarily use the same marking or coating arrangement. Follow the current instructions for the exact supplied product. If the pane is cut from a larger sheet, ask the supplier how its identity and orientation should be maintained on the cut piece before its markings or packaging are discarded.
- A scratch test can damage a viewing surface and is unnecessary for a properly identified supplied pane. Prefer the supplied markings and documentation. When identity remains uncertain, obtain an answer from the supplier before completing the frame. A few minutes spent identifying the pane is more useful than trying to infer a protection claim after the artwork has been fitted and the back sealed.
Keep the protective specification through future changes
A frame may outlast several panes or several displayed images. When glazing is replaced, carry forward the required protection specification deliberately rather than assuming a visually similar sheet is equivalent. When the artwork changes, review whether the original material and mounting decisions still apply. Keep an order reference outside the artwork-contact area and preserve any supplier care information. If the frame is passed to another owner or shop, provide that record with it. A clear front photograph cannot establish UV performance or identify the intended face orientation. The practical value of documentation is that a later fitter can reproduce the relevant properties without destructive testing, guesswork, or relying on the age of the frame. That continuity supports the original framing purpose.
Choose clear viewing with an honest reflection assessment
- UV filtering and reflection control are separate properties. The clear conservation example can still show windows, lamps, and the room behind the viewer. Compare it over the actual artwork, particularly dark areas and fine detail. A reflected image may be obvious over a dark photograph and less apparent over a pale print. The fact that both use the same pane does not mean the display experience will be identical.
- Test the proposed wall and viewing position. Moving a light or choosing a different location may provide a satisfactory clear view without changing the glazing. If the room cannot be changed and reflections remain intrusive, compare a suitable anti-reflective conservation option. Keep the UV requirement explicit while testing appearance so a visually quieter sample is not selected without checking its protective specification.
- Include the intended mat or spacer gap. A fair comparison keeps the same image, separation, lighting, and viewing angle. Do not judge one sample directly on the print and another above a deeper package. The frame is a complete construction, and its actual geometry determines the view that will remain after the samples are put away.
Plan the artwork's surroundings as a system
- UV-filtering glazing does not establish that the mat or backing is suitable for contact with the artwork. Verify the selected boards and mounting materials independently. An unidentified brown backing remains unidentified behind a conservation pane. Record the actual contact materials in the order so the preservation plan is more than a protective feature at the front of the frame.
- Choose the attachment method for the work and its future needs. A window mat can define the crop and help create separation, but it is not automatically a mounting system. Do not rely on pressure between glass and backing to keep the image in position. The artwork should have its intended support and attachment before the package is retained.
- Display conditions also remain relevant. UV filtering addresses part of light exposure, not every source of fading or deterioration. Avoid treating a high filtering figure as permission for direct sunlight or indefinite bright display of sensitive paper. If the work is valuable or already damaged, seek appropriate conservation advice about the complete package and display plan rather than attempting to predict its future condition from the pane alone.
Check the physical package before cleaning and assembly
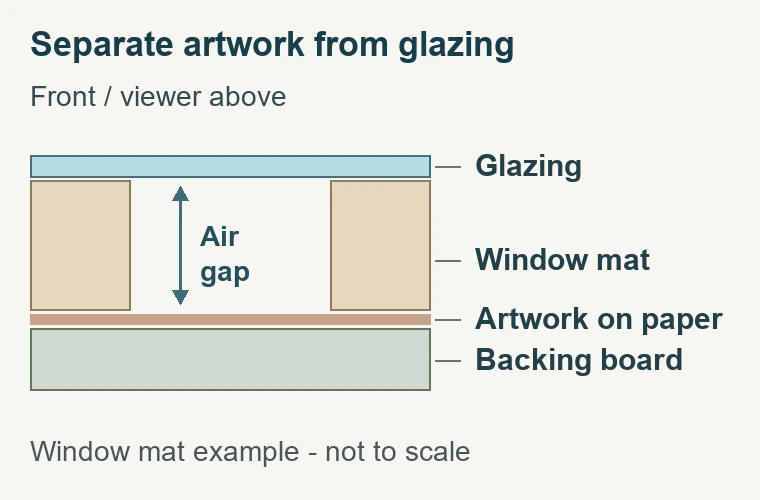
- Confirm the receiving dimensions from the frame or designer instructions. The visible artwork window, paper size, mat outside size, and outside moulding dimensions can all differ. The pane must match the intended package size. Use the specified measuring convention and avoid adding an extra allowance simply because another supplier handled its dimensions differently.
- Include glazing thickness with mats, spacers, artwork support, and backing in the depth check. Usable rabbet depth is the relevant space, not the moulding's overall external height. Determine where the completed backing will sit and which retaining method suits that position. An over-deep package should be resolved by a coherent frame or component decision rather than forced into place with retainers.
- Inspect the glass and frame before proceeding. A damaged pane, chipped edge, distorted opening, or component catching the rabbet should be addressed while the artwork is still separate. Work on a clean protected surface with the pane fully supported for its size. Keep loose screws and tools away from the areas where either face will rest.
Maintain the correct face orientation through fitting
- Identify the product and current orientation markings before cleaning.
- Keep the indicated artwork-facing side associated with that orientation as the pane is handled.
- Prepare both faces using the exact product's care instructions.
- Place the pane in the frame with the required side towards the work.
- Add the planned separation, mounted artwork, and backing.
- Inspect the front before and after installing the retaining hardware.
If several panes are being prepared, keep each one with its own order information. Do not set similar clear sheets into an unmarked pile and rely on memory to distinguish regular from conservation glass later. A temporary work record outside the artwork package is preferable to an improvised label on a viewing surface or a component that will contact the work.
When cleaning, use the supplied care method and clean materials. Keep residue and liquid out of the frame edges. Do not assume that a more aggressive treatment will improve an uncertain mark; first identify whether it is dirt, an instruction marking, a scratch, or a reflection. If the glass needs replacement, preserve its identity and orientation information with the replacement order.
Check the completed presentation and order record
- Inspect the visible image, signature area, mat alignment, and spacer concealment. Check that the artwork remains separated from the pane as planned and that no debris was introduced during fitting. Retainers should hold the package without distorting it. A neat paper back should be the finishing step after those checks, not a way to conceal an unresolved fit issue.
- Keep the glass product, size, thickness, current protection specification, and care instructions together. Include the mat, backing, mounting, and display decisions that accompany it. This record is useful if the pane breaks, the artwork changes, or another shop services the frame. A clear front photograph documents appearance, but it cannot identify all of the hidden material properties or the face orientation.
- Compare quotations using equivalent specifications and scope. A regular clear pane is not the same item simply because its reflection looks similar. An anti-reflective conservation pane may address another requirement and should be assessed separately. Check what the order includes and which components or fitting work remain. Selecting Conservation Clear is one deliberate decision within that complete order.
- The useful outcome is verified UV-filtering glass fitted in its intended orientation within a suitable package. It should offer the clear view you selected while the rest of the materials and display conditions serve the artwork. If protection, reflection, fit, or identity remains uncertain, resolve that particular issue before treating the frame as complete.
Made in the USA
Handcrafted by American framing experts
Family Owned
Serving customers for over 40 years
Premium Shipping
Professionally packaged for safe delivery
Ready to Hang
Hardware included with all frames
Framing Specialists
Over 40 years of custom framing experience
