
Ok

Ok

What is the question
Cancel
PICTURE FRAMES
 CUSTOM PICTURE FRAMES
Design Your Framing Package Online!
Add Mats, Glass & Acrylic, Mounting Board And More.





Search
☰

My Account
Log In
Favorites
Saved Designs
Shopping Cart
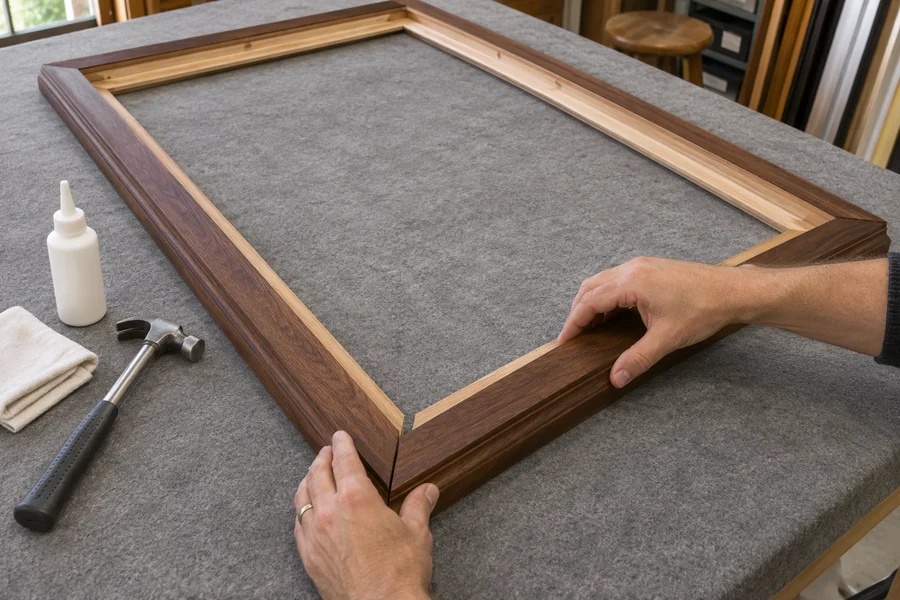
Join a supplied wood frame kit with dovetail keys while keeping long rails and fresh corners supported. Start with the complete demonstration, then use the written checks below.
Watch: assemble a large wood frame
This is the complete large-frame demonstration. The written steps below also draw on our detailed two-part dovetail-joining instructions.
This guide is for a pre-cut kit with routed dovetail-key slots. It does not cover cutting raw moulding or routing the joints. Use the keys, support pieces, and instructions supplied for your frame; a different joining system needs its own method.
1. Prepare the kit and a fully supported work area
Identify the matching long and short rails, supplied dovetail keys, and any profile-support spacers or seating piece. Use a clean, protected flat surface large enough to support the frame and arrange the rails before applying glue.
- Kit: the four frame rails and matching joining keys; inspect any supplied spacers and seating piece before starting.
- Tools and materials: a small hammer, suitable wood glue, and clean tissue or cloth for cleanup. Check what your kit contains instead of assuming glue or tools are included.
- Surface: protect both the frame finish and the table. Clear enough space to reposition the rails without letting them drop off an edge.
- Help: arrange a second person when you cannot support and control both ends of a large section yourself.
Sort different key sizes into separate groups. Check the kit and joint layout before gluing; do not recut rails or enlarge routed slots to make an uncertain fit work.
2. Support the moulding and align the first corner
Place one long and one short rail together with the routed joining slots accessible. Use the supplied profile-support spacer when needed to keep the moulding steady. Align the miter faces and corresponding slots without twisting the rails.
The profile matters. A shaped moulding may tip toward or away from its joining face when laid down. The support spacer shown in the joining instructions steadies it under the lip; it is not an extra component of the finished artwork package.
Bring the miter faces together and check that each pair of slots lines up. Do this while the rails are supported, before attempting to drive a key.
3. Glue the miter and seat the matching keys gently
Apply a controlled amount of suitable wood glue to the joining faces, bring them together, and hold the joint aligned. Match each supplied key to its slot and tap gently to seat it using the kit's instructions. Use the supplied seating piece if provided, and avoid excessive force.
- Apply a controlled amount of suitable glue to the mating faces, avoiding a large excess that will squeeze over the finish.
- Close the miter and hold the rails together with their faces and slots aligned.
- Choose the correct key for each routed slot. The site's demonstration uses different sizes; do not interchange them.
- Tap gently to start the key, keeping the joint supported and closed.
- Seat the key as directed for the kit, using the supplied seating piece if provided. Do not keep hammering after it is seated.
The detailed joining demonstration uses a smaller key toward the front and a larger one toward the back of its example profile. Match your own supplied slot-and-key arrangement rather than applying that layout to every moulding.
Glue is part of this joining method. A key that feels tight is not a reason to omit the adhesive or skip its curing instructions.
4. Make two L sections and move them with support
Join the second long-and-short pair in the same way. Support both rails when moving either L section so a long rail cannot drop or lever against a fresh corner. Bring the two L sections together with their remaining miters aligned.
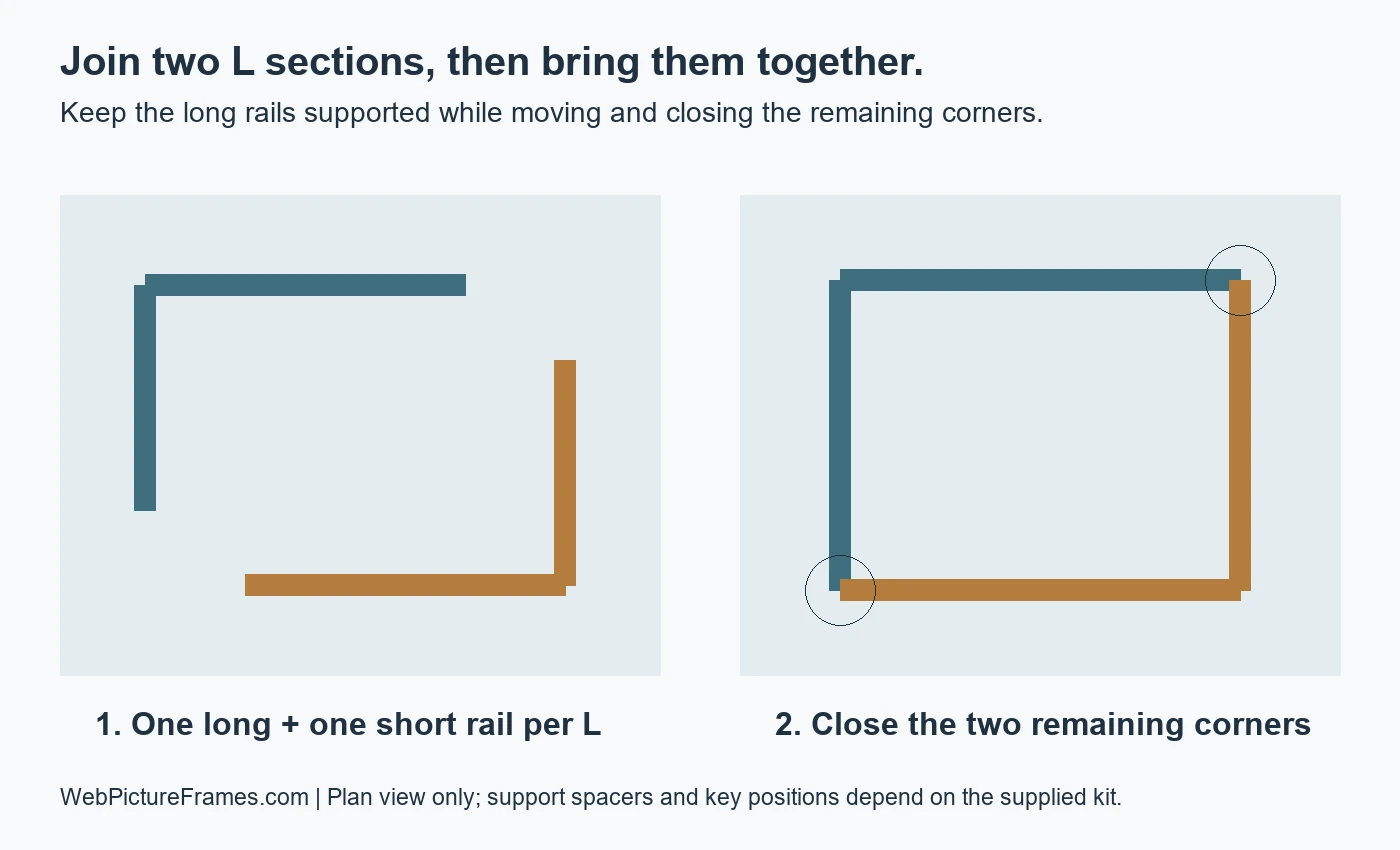
Support the rails, not just the joined corner. A long rail hanging off a table can act as a lever against a fresh joint. Move slowly with both rails controlled; get help when the section is too large to handle that way.
The detailed demonstration repositions sections without loading the joined corner. Do not treat a single inserted key as proof that a large L can be lifted by one end.
5. Check both remaining corners before closing them
Check both remaining corners before gluing and keying them. If closing one corner opens another fresh joint, stop rather than forcing the rectangle shut. Allow the earlier joints to set as appropriate for the glue and joining instructions before completing the stressed corner.
Bring the two L sections together on the protected surface. Look at the opposite open corner while closing the one in front of you. If closing it would pull a fresh joint open, pause and follow the kit and adhesive instructions for letting the earlier joints set.
Keep the last rail supported during repositioning. Do not let its weight swing against the already-joined corners. Complete the remaining joints using the same alignment, glue, and key checks.
Do not force a height correction. The detailed joining demonstration discusses a delicate rocking adjustment and explicitly cautions that it can damage the frame. If a corner remains stepped or will not align, keep it supported and ask for help rather than twisting the rails.
6. Inspect the joints before fitting artwork
Inspect all four corners and remove glue squeeze-out promptly using a method compatible with the finish. Keep the assembled frame supported and follow the glue manufacturer's setting and curing instructions before loading it with artwork or handling it by one rail.
- All four miters meet without a new gap appearing when the frame rests flat.
- Each supplied key is in its matching slot and seated as instructed.
- No rail is rocking on an unsupported moulding profile.
- Glue squeeze-out has been addressed without damaging the finish.
- The adhesive has had the required setting and curing time before fitting or loading the frame.
There is no single drying time or maximum finished size established by this guide. Follow the actual glue instructions and ask about your frame if a joint, rail, or load is uncertain.
If a joint will not go together
| Problem | What to check |
|---|---|
| The profile rocks and slots do not align | Check the work surface and the supplied profile-support spacer before starting a key. |
| A key will not start or seems wrong for the slot | Recheck its size, the matching slots, and alignment. Do not substitute a larger hammer blow for a fit check. |
| The front corner is stepped | Check support and alignment without forcing or twisting the rails. Ask for help if it remains uneven. |
| Closing the last corner opens another | Stop applying force. The earlier joints may need to set before the stressed corner is completed. |
| A corner opens while the section is moved | Support both rails and stop handling it by one end. Get advice on restoring the glue joint and checking the keys. |
Common large-frame assembly questions
Does this method work for any wood frame?
No. It is for a supplied, pre-cut frame kit with routed slots and matching dovetail keys. It does not explain cutting raw moulding, routing slots, or using a different joining system. Follow the instructions for the kit you received.
Why are support spacers included with some kits?
Some moulding profiles rock or tip when laid on the work surface. A matching support spacer steadies the profile so the joining slots line up while the corner is assembled. A flat profile may not need the same spacer.
Can I assemble the frame with keys alone and skip the glue?
The site's dovetail-joining instructions use both glue and keys. They describe the glue as part of the joint's hold, not an optional substitute for the keys. Use suitable glue and the supplied joining instructions rather than assuming a dry key-only assembly is complete.
Why should I make two L sections?
Joining one long and one short rail into each L lets you assemble and support the first two corners before bringing the sections together. The remaining corners still need alignment and support; the long rails must not hang or twist against fresh joints.
What if the last corner will not close without opening another joint?
Stop rather than forcing the last corner. The site's two-part joining demonstration discusses letting earlier joints dry before completing a corner that would stress them. Follow the glue and kit instructions and ask for help if the fit remains uncertain.
How long should I wait before fitting the artwork?
Use the setting and curing instructions for the actual glue and joining kit. A corner that holds its shape is not proof that the adhesive has fully cured. Keep the frame supported and do not load it with glazing, artwork, or backing before it is ready.
After the frame is assembled
Joining the rails creates the frame. It does not install the glazing, artwork, mats, backing, or hanging hardware. Use how to fit art into a wood picture frame for the next stage, and what to order with a frame to check the components.
Considering unassembled shipping? Read the large-frame shipping guide. The complete order's size and components affect which choices are available; assembly at home does not guarantee a particular shipping saving.
For the detailed corner technique, use our two-part dovetail-joining guide. This large-frame guide focuses on supporting long rails and handling the assembled sections. Our family-owned business has more than 40 years of practical framing experience.
Made in the USA
Handcrafted by American framing experts
Family Owned
Serving customers for over 40 years
Premium Shipping
Professionally packaged for safe delivery
Ready to Hang
Hardware included with all frames
Framing Specialists
Over 40 years of custom framing experience
