
Ok

Ok

What is the question
Cancel
PICTURE FRAMES
 CUSTOM PICTURE FRAMES
Design Your Framing Package Online!
Add Mats, Glass & Acrylic, Mounting Board And More.





Search
☰

My Account
Log In
Favorites
Saved Designs
Shopping Cart
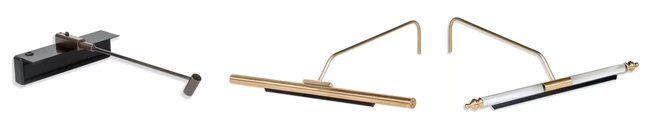
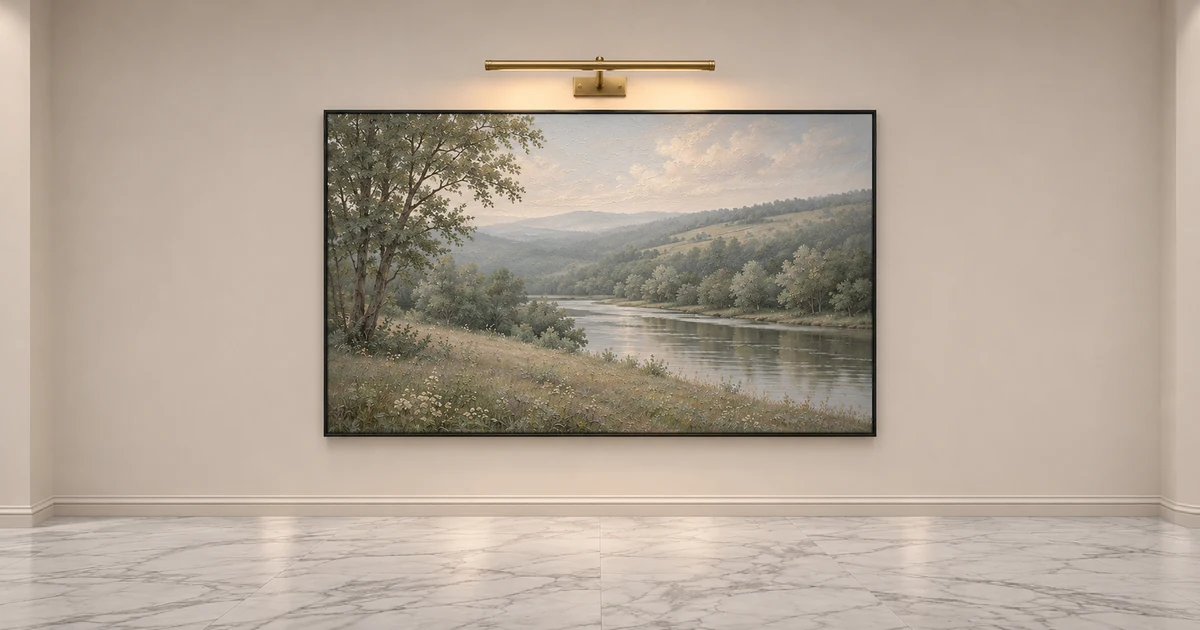
Choose a picture light that reaches the edges of your artwork and suits the way you use the room. Learn what to measure, when to choose rechargeable or plug-in lighting, and how to select a finish that works with your frame.
By WebPictureFrames.com. Family owned with more than 40 years of custom framing experience. Updated .
How to choose a picture light in four steps
- Measure the art. Record its width and height as it hangs. Measure the outside of the frame separately.
- Choose the power source. Rechargeable lights keep cords off the wall. A plug-in light suits a picture you illuminate most evenings.
- Match the controls to the room. The Micro has an adjustable head, the Touch has a removable light bar, and the plug-in Classic lets you adjust brightness from your seat.
- Pick the finish. Look at the frame in daylight. Choose the metal tone you want to see above it when the light is off.
Which picture light fits your artwork?
| Light | Recommended artwork width × height | How you use it |
|---|---|---|
| Rechargeable Micro | Up to 24 × 24 in. | Rests on top of the frame. Aim the small head and choose between two brightness levels. |
| Rechargeable Touch | Up to 36 × 24 in. | Adjust the bar to one of three brightness levels. Lift it off its magnetic mount to recharge. |
| Plug-in Classic | Up to 48 × 36 in. | Plugs into an outlet. Use the remote to fine-tune brightness from your viewing position. |
Read the dimensions in the direction the art hangs. A 36-inch-wide landscape and a 36-inch-tall portrait put the farthest corner in different places. Match both measurements, then compare all SITU picture lights and finishes.
How to measure a framed picture for a light
- Record the artwork width and height. SITU uses the unframed artwork dimensions for sizing. Leave the mat and moulding out of these numbers. If the piece is already framed and the paper edges are hidden, use the original art dimensions if known, or record the visible opening and label it as such. Leave a sealed frame intact.
- Measure the outside of the frame. Record the finished width and height. Then measure straight down from the top edge of the frame to the top of the visible image. This gap includes the top rail and the top mat border.
- Check the frame from the side. Note how far the face of the top rail projects in front of the artwork. Use the glass or acrylic as a visible reference if the work is glazed. For a rechargeable light, also check the space above and behind the frame so you can lift the fixture away to charge it.
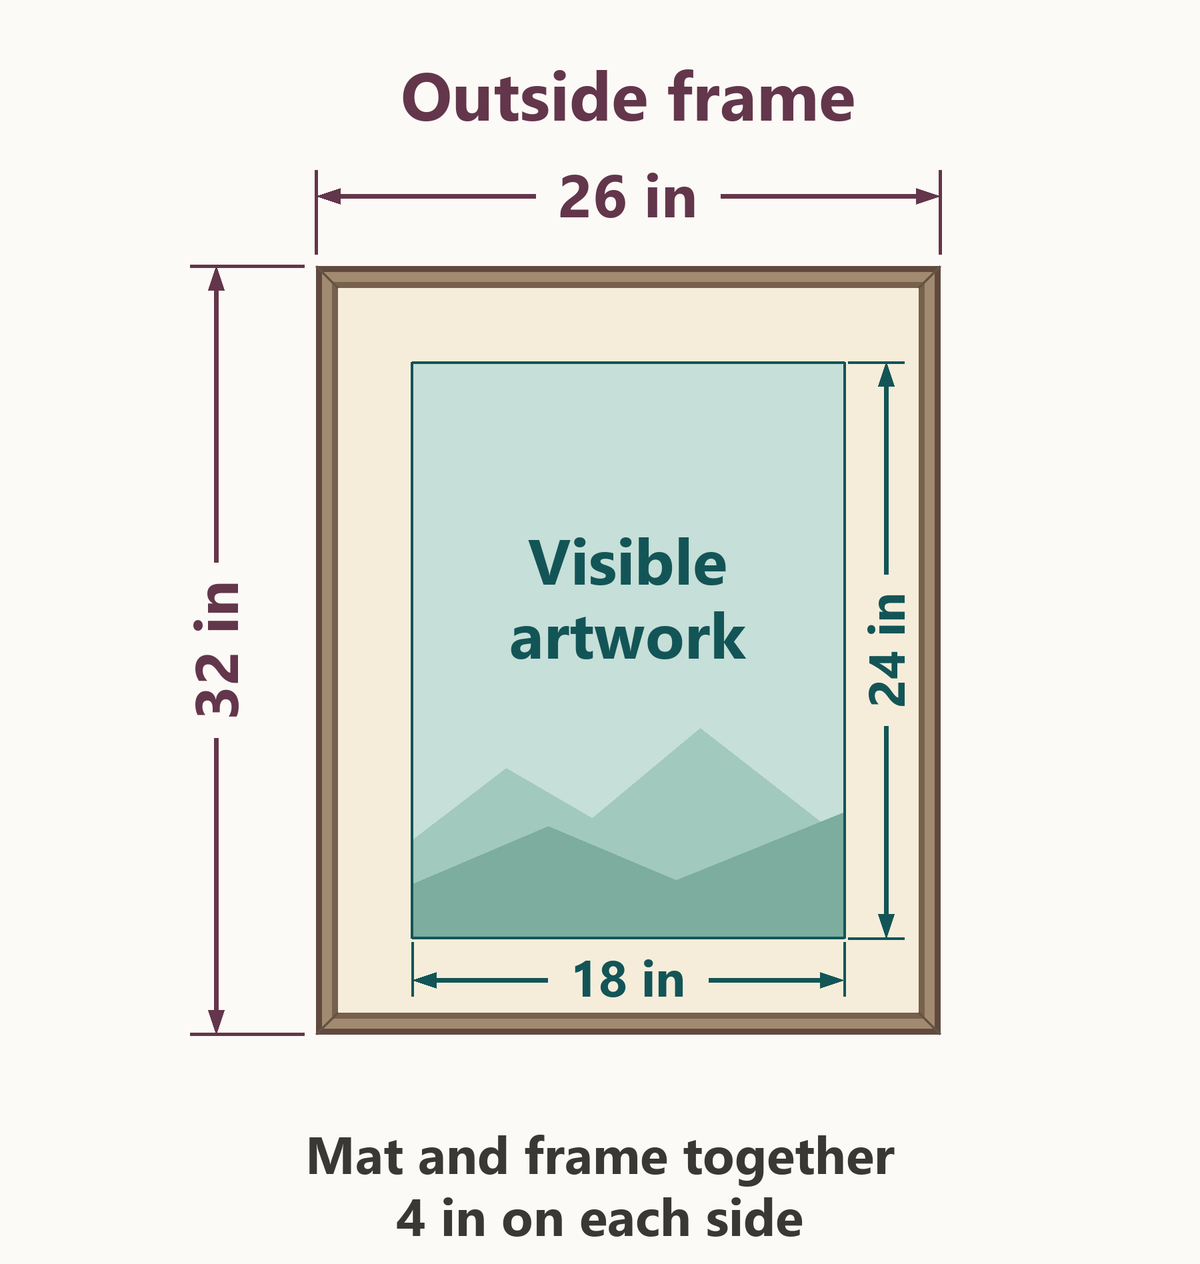
An 18 × 24-inch picture in a 26 × 32-inch frame
The full image is visible, and the mat and rail together add 4 inches on each side. Use 18 × 24 to choose the light. That puts this print in the Micro's recommended range. Keep 26 × 32 for placement. The top rail, where the fixture sits, is 4 inches above the image.
How a wide mat or deep frame affects the light
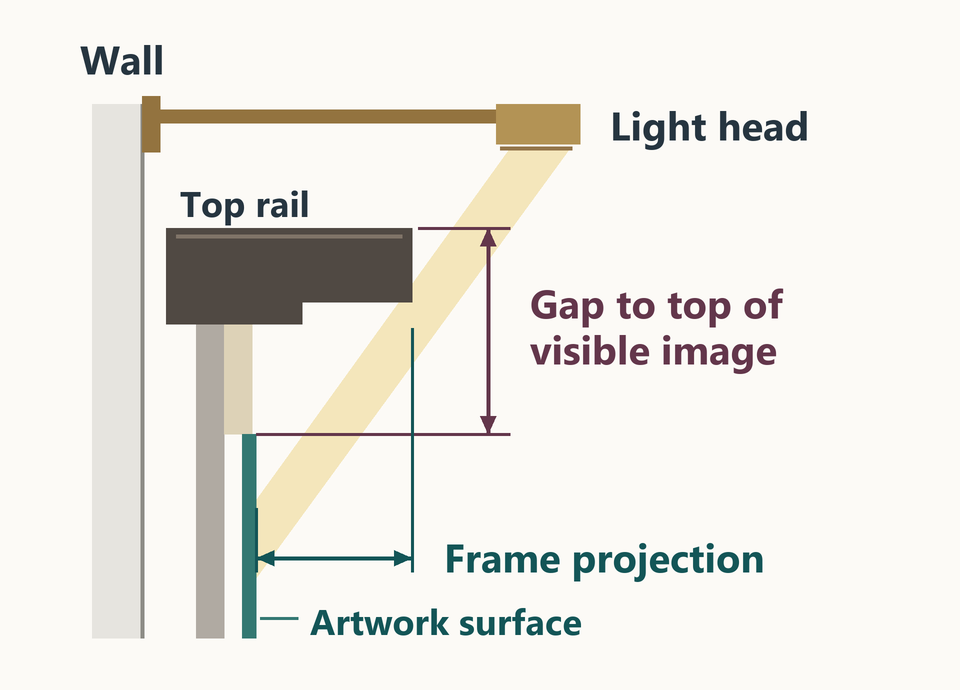
- Wide top mat. With the light in the same position relative to the top rail, a wider mat puts the artwork farther below the light. Look at where the image begins and how far the light has to reach down to its lower corners.
- Deep or raised top rail. A rail that projects in front of the artwork can cast a shadow near the top of the image. From the side, look at whether the light head reaches forward far enough to direct light past the rail.
Use the artwork's width and height to find a light in the SITU picture-light comparison. Use the frame measurements to picture where the light head will sit. Once the light is in place, look at the upper edge and both lower corners from your usual viewing spot.
If you are framing the piece for the first time, our artwork measuring guide shows where to place the tape on a print, canvas, or panel.
Should you choose the rechargeable Micro or Touch?
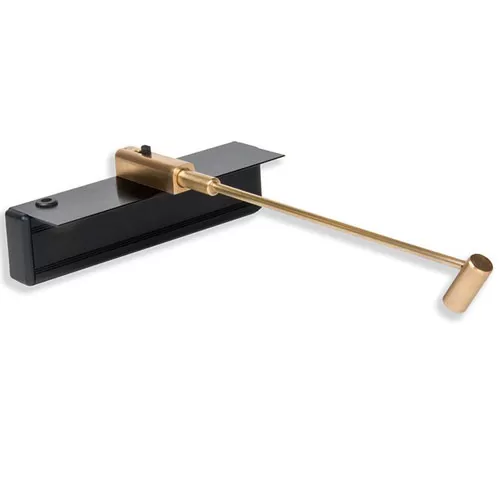
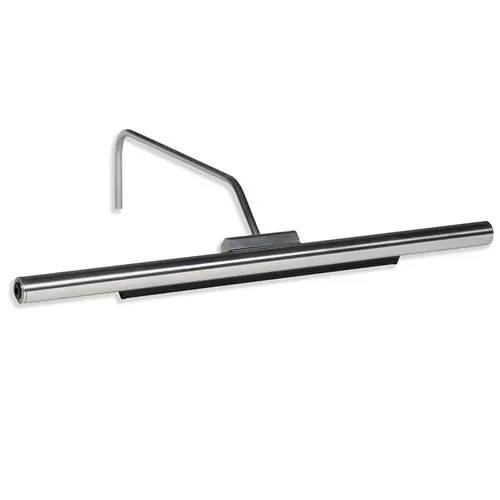
Micro for a small print, painting, or photograph
The Micro rests over the top of the frame, with its battery pack behind the artwork. The small head leaves the moulding visible. It is a useful choice for a framed print you move between rooms, since you can lift the light off the frame for charging or move it with the piece.
For art up to 24 inches wide by 24 inches high, use the articulating head to direct light across the image. Try the lower of its two brightness settings in a softly lit room, then compare the higher setting with your room lamps on. The Micro switches off automatically after five hours.
See the aluminum Micro, brass Micro, or antique bronze Micro for the finish and current price.
Touch for a wider artwork where you can reach the light
A 30 × 20-inch landscape is a good example of where to choose the Touch. Its recommended coverage extends to 36 inches wide by 24 inches high. The horizontal bar echoes the top rail on a wide frame. A mount on the frame or wall stays in place when you lift the light away to charge, so the bar returns to the same position.
Select one of three brightness levels at the fixture. The Touch switches off automatically after five hours. Picture it in the spot where it will hang. Over a sideboard, the control may be within easy reach. Over a deep sofa, the plug-in Classic's remote lets you adjust brightness from where you sit.
Compare the aluminum Touch, brass Touch, and antique bronze Touch alongside the color of your frame.
Choosing a plug-in picture light for a permanent display
If you light the same artwork most evenings, a plug-in fixture removes the charging routine. You can dim the Classic from your viewing position and see the effect on the picture as you adjust it. Before deciding, trace the route to the outlet, including the drop below the frame and the distance across the wall. Consider whether the cord, plug, or power supply will be visible from the doorway or from the side.
What size artwork can the plug-in Classic cover?
The plug-in lights we carry are recommended for artwork up to 48 inches wide by 36 inches high. For a 40 × 28-inch canvas over a mantel, for example, the Classic gives you the coverage of the larger model and a way to adjust the light from the room. With more than 60 light settings available from the remote, you can bring up detail in a dark passage a little at a time.
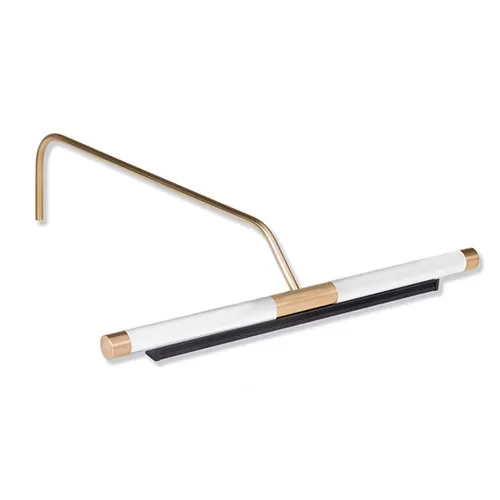
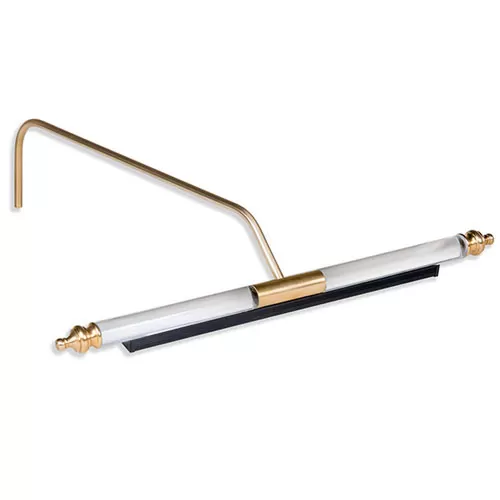
| Body and end detail | Brass | Antique bronze |
|---|---|---|
| Clear acrylic, end caps | Clear with brass caps | Clear with bronze caps |
| Clear acrylic, finials | Clear with brass finials | Clear with bronze finials |
| Frosted acrylic, end caps | Frosted with brass caps | Frosted with bronze caps |
Judge the housing with the light switched off, when its outline is easiest to see. For a frame with a narrow gilt edge, decide whether you want brass ends to pick up that detail or a darker bronze to recede against the wall. Compare clear and frosted acrylic for the look of the fixture itself. Neither finish specifies how reflective the glazing in front of your art will be.
How to aim the light and check reflections
Once you choose a fixture, see how high to mount a picture light for a diagram of the gap above the frame and a checklist for positioning the bracket.
- Look from where you actually view the picture. With the picture light off, look at the glass from the doorway, then from the usual seat or standing position. A window or room lamp you can already see reflected in a dark area of the picture will still need attention after you add a picture light.
- Start at low brightness. With the fixture in a supported position, use its available adjustments and check the upper edge, both lower corners, and the center. If the upper rail casts a shadow or the lamp appears in the glass, adjust the permitted aim or position and look again before increasing brightness. Check a glossy canvas from the same positions even if it has no glazing.
- Repeat in typical room light. Daylight and an evening reading lamp can produce different reflections. If a window still shows in the image with the fixture off, try viewing it from an adjacent seat. If you are choosing glazing for a new frame, compare glass and acrylic options for reflection control.
For a watercolor or family photograph, a low setting often gives you enough light to enjoy the detail in the evening. Switch the fixture off between viewings to limit exposure. If the frame hangs near a window, check where daylight falls on the wall before choosing a permanent spot.
What to have ready before you order
- Artwork width and height in hanging orientation, plus the outside frame width and height.
- Space above and behind the top rail for the fixture and access to its controls.
- Your preferred control position, access for recharging, or a measured route to an outlet.
- The metal finish you want next to the frame. For plug-in lights, also choose the acrylic body and end detail.
Picture lighting questions
Do I measure the artwork, the mat, or the outside of the frame?
Use the width and height of the artwork itself for SITU's size comparison. Exclude the mat and frame from those numbers. Take a second pair of measurements around the outside of the frame so you can describe how far the fixture will sit from the image.
Which picture light can I use without an outlet near the artwork?
Both the SITU Rechargeable Micro and Rechargeable Touch run without a cord on display. The Micro rests on top of the frame and lifts away as a unit. The Touch has a light bar that detaches from its magnetic mount. Either can be taken to an outlet for charging.
Which SITU picture light has a remote control?
The plug-in Classic options in our collection include remote-controlled dimming. The rechargeable Micro and Touch offered here have controls on the fixture. A remote is particularly useful when the artwork is hard to reach and an outlet is accessible.
Does frosted acrylic on the light reduce reflections on picture glass?
Frosted acrylic describes the body of the plug-in fixture. To manage a reflection on the artwork, check the light's position, the glazing, and where people stand or sit. Choose the housing finish for how it looks alongside the frame.
How bright should a picture light be?
Begin at the lowest setting and look at the picture from your usual viewing spot. Increase brightness until the shadow detail is easy to see and the highlights still look natural. For photographs and works on paper, switch the light off between viewings to limit light exposure.
Choose your picture light
Browse the finishes together, or send our framing team a photo of your display if you would like help choosing between two lights.
Made in the USA
Handcrafted by American framing experts
Family Owned
Serving customers for over 40 years
Premium Shipping
Professionally packaged for safe delivery
Ready to Hang
Hardware included with all frames
Framing Specialists
Over 40 years of custom framing experience
