
Ok

Ok

What is the question
Cancel
PICTURE FRAMES
 CUSTOM PICTURE FRAMES
Design Your Framing Package Online!
Add Mats, Glass & Acrylic, Mounting Board And More.





Search
☰

My Account
Log In
Favorites
Saved Designs
Shopping Cart
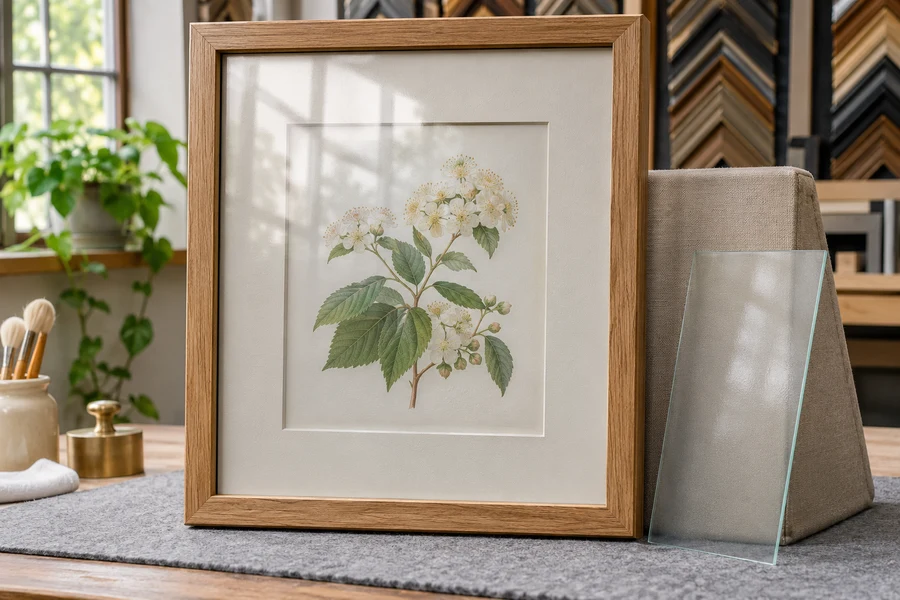
Non-glare glass diffuses a reflected scene instead of returning a sharp mirror image. Check its effect on image clarity without removing the artwork separation the package needs.
Watch: Non-Glare Picture Frame Glass Explained
Diffused reflections have a different appearance
Non-glare glass is also called reflection-control glass. Its surface softens the reflected scene into a diffuse appearance. The effect differs from anti-reflective coated glass, where reflections are reduced while preserving a clearer view.
Non-glare is a surface-finish description, not a complete statement about UV performance. The regular non-glare example should not be confused with a separately specified conservation product.
Non-glare glass: symptoms and next checks
| What appears wrong | What to check |
|---|---|
| The image looks softer than the sample. | Compare the actual gap, artwork detail, orientation, and cleanliness. |
| The room is still visible as a bright area. | Assess the diffused reflection under the real lighting and compare another location. |
| The UV property is uncertain. | Identify the exact product and current specification. |
| The pane does not seat evenly. | Check size, frame geometry, and the full package before applying retainers. |
| The finish is not the one expected. | Clarify diffusing non-glare versus coated anti-reflective glass with the supplier. |
Check spacing and the treated side
Consider keeping the image relatively close to the glass because a large gap makes the diffusing effect more apparent. That can be a limitation for deep shadow boxes and heavily layered packages.
- Compare the finish over artwork with similar fine detail.
- Include the actual mat or spacer distance in the test.
- Identify the treated side using the product instructions; the reflection-control surface faces the viewer in this arrangement.
- If the required gap makes the image too soft, choose another glazing treatment rather than eliminating necessary artwork separation.
Compare the alternatives before fitting
A less reflective appearance alone does not establish conservation protection. Compare anti-reflective glass and Museum Glass if clarity across a deeper package matters.
Follow the current sheet's care and fitting instructions. The glass-selection guide explains the broader choice and links currently offered glazing. For a similar diffusing finish in a lighter material, compare non-glare acrylic.
Compare the current glazing collection before ordering a replacement. This article explains diffusing non-glare glass as a category; there is no matching non-glare glass listing in that collection. The available P99 non-glare acrylic and OP3 P99 UV-filtering non-glare acrylic provide acrylic comparisons. For a coated glass view, compare Anti-Reflective Glass or Museum Glass, checking the required protection separately.
Choose the diffused reflection deliberately
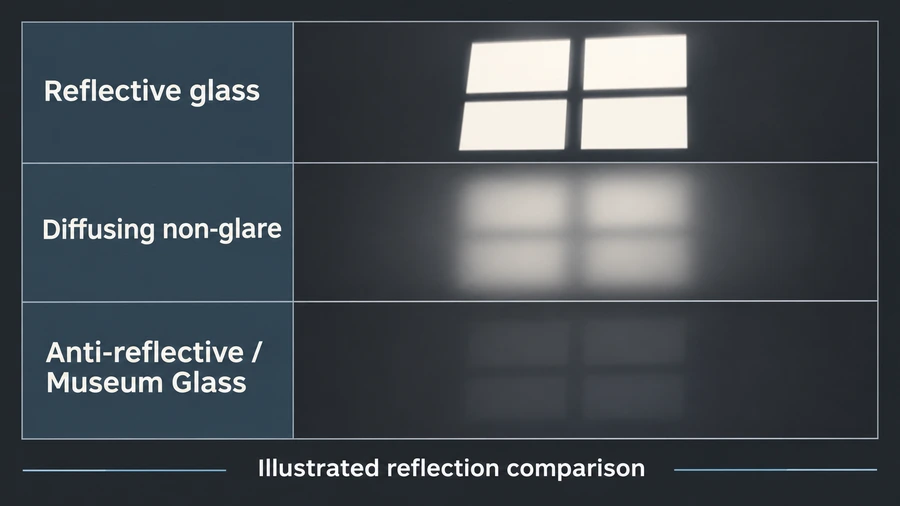
- A diffusing non-glare surface changes the reflected scene from a recognizable image to a softer appearance. That is the visual purpose of the treated surface. It does not mean every light disappears or that all glazing properties have improved together. Evaluate the view of the artwork and the reflection at the same time. A softer bright area can still be distracting if it crosses the part of the image you most want to see.
- A non-glare or reflection-control label does not identify every specification of the supplied pane. Confirm the actual product, treated face, UV properties, thickness, and care instructions. In particular, do not transfer a protection percentage from another product to a newly supplied item simply because both have a similar-looking diffused surface.
- Keep the distinction from anti-reflective coated glass clear. Both may be discussed as reflection-control choices, but the diffusing finish changes the viewing behavior differently. Compare both surface treatments under the same lighting. Use the exact product category when ordering or asking for a replacement so the supplier does not have to infer whether you want diffusion or a coated low-reflection view.
Document the accepted sample arrangement
Keep a short record of the image used for the test, the mat or spacer gap, the treated-face orientation, and the viewing location. A quick photograph can document the layout, although it may not reproduce every reflection seen by the eye. These details explain why the finish was accepted and help when the frame is serviced. If a replacement picture has smaller writing, darker areas, or a deeper mount, repeat the relevant test rather than transferring the old conclusion automatically. The same pane can be viewed through a different package. A useful record preserves the comparison conditions as well as the product name, so a future decision is based on the actual artwork and display rather than a vague memory that non-glare looked satisfactory.
Include the actual artwork gap in the test
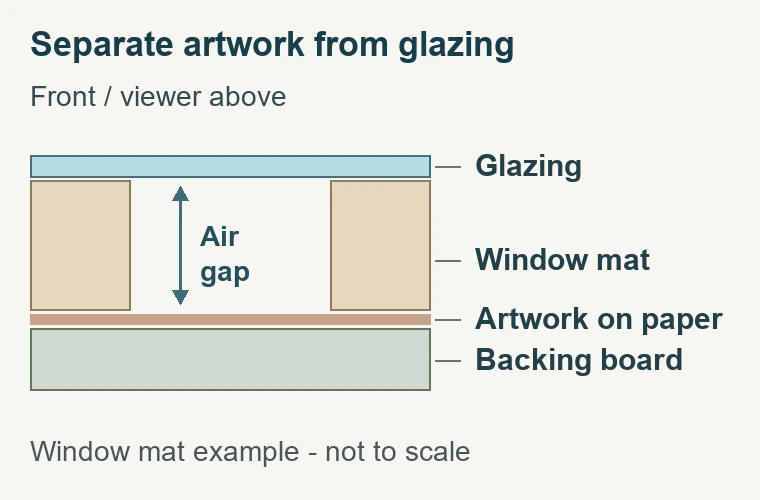
- The distance between picture and pane matters when judging a diffusing finish. Reproduce the intended mat or spacer arrangement before making the decision. A loose sample resting directly on a print does not represent a deep framed package. Test the important fine detail, text, and dark areas through the planned gap and look at the whole image from its normal viewing distance.
- A diffusing finish can soften detail as the artwork-to-glass gap increases. Do not interpret that as an instruction to press sensitive artwork directly against glazing. Separation and mounting requirements still apply. If the necessary gap produces more softness than you want, compare another pane or surface treatment. Removing a required physical separation is not an appropriate remedy for a viewing effect.
- For several mat layers, test the total stack rather than estimating from a single board. A raised mount or additional spacer may place the artwork farther away than expected. Record that actual arrangement with the chosen glazing. A later change in mat construction can alter the result even if the same pane and outer frame remain, so the successful test belongs to a package rather than to the glass in isolation.
Compare it where the picture will be displayed
- Identify the reflection you are trying to reduce. A sharp window outline over a dark photograph, a lamp above a desk, and a broad bright wall behind the viewer create different problems. Test the pane in a position that reproduces the actual geometry. A sample photographed under controlled light may show the finish clearly without predicting its appearance on your wall.
- Look from more than one useful position. A picture in a hallway may be viewed while approaching from the side; one above furniture may be seen from below. Check those angles without expecting one surface to eliminate all reflections under every condition. The relevant result is an acceptable view during normal use, with the image detail still readable and the reflected light less intrusive.
- Try a location or lighting change as part of the comparison. If moving a lamp or choosing a nearby wall solves the reflection, regular or conservation clear glazing may remain an option. If the room is fixed, compare the non-glare finish with a suitable coated anti-reflective sample. Keep the same picture and gap so the comparison reveals the surface difference rather than unrelated changes.
Specify protection and physical fit separately
- Non-glare describes appearance, not a complete preservation specification. If the artwork requires conservation UV filtering, identify a product that states that property. Do not infer it from the frosted-looking reflection. Likewise, a UV-filtering pane does not make every display location suitable. The artwork's contact materials, mounting, and exposure conditions remain separate decisions that should be included in the framing plan.
- Confirm the receiving dimensions, following the supplier's measuring convention. The pane fits the package opening, not the outside dimensions of the moulding. If mats enlarge the package beyond the image, include that larger size. Record thickness too, because glazing, mat layers, artwork support, backing, and spacers all occupy the usable rabbet. The retaining hardware must suit the completed back position.
- Assess glass as a handling material for the actual project. A small sample does not establish a maximum pane size or frame capacity. Consider the completed weight, transport, installation, and display location. If lower glazing weight or a different breakage behavior is important, compare acrylic with the required finish and protective properties rather than assuming all transparent materials can be handled in the same way.
Identify the surface and prepare the pane
- Use the supplied product information to identify the treated face before fitting. Keep markings or packaging associated with the correct pane until that question is settled. Do not use an abrasive experiment on the viewing area to distinguish sides. If a cut piece cannot be identified reliably, ask the supplier rather than assuming that the face which looks different under one lamp must be the correct outward surface.
- Inspect the pane for damage and size before bringing it over the artwork. Work on a clean protected surface and keep loose fasteners and tools away from the glass. A damaged edge or incorrect size should be addressed before fitting. Retainers are not a way to force the pane into an opening or compensate for an uneven package beneath it.
- Clean using the method specified for the actual glass. Do not try to polish away the intended diffusion or apply a chemical because it worked on another pane. Once the surfaces are ready, fit the planned mat or spacer separation and the supported artwork. Inspect the front before adding the final retainers, then inspect it again after the package is secured.
Resolve the specific appearance problem
- Keep a record of the product and the tested package. Include the intended orientation, gap, mat construction, and receiving dimensions. That information is useful when replacing a broken pane or adding a matching picture. A shorthand note such as glare-free glass may not communicate which physical treatment produced the accepted result.
- The final choice should satisfy appearance, artwork requirements, and fit together. If the diffused reflection is useful but detail is unacceptable through the required gap, another glazing treatment may serve the project better. If the view is acceptable, preserve the tested construction and follow its care instructions. A successful sample comparison does not mean one finish suits every framed work.
Made in the USA
Handcrafted by American framing experts
Family Owned
Serving customers for over 40 years
Premium Shipping
Professionally packaged for safe delivery
Ready to Hang
Hardware included with all frames
Framing Specialists
Over 40 years of custom framing experience
