
Ok

Ok

What is the question
Cancel
PICTURE FRAMES
 CUSTOM PICTURE FRAMES
Design Your Framing Package Online!
Add Mats, Glass & Acrylic, Mounting Board And More.





Search
☰

My Account
Log In
Favorites
Saved Designs
Shopping Cart
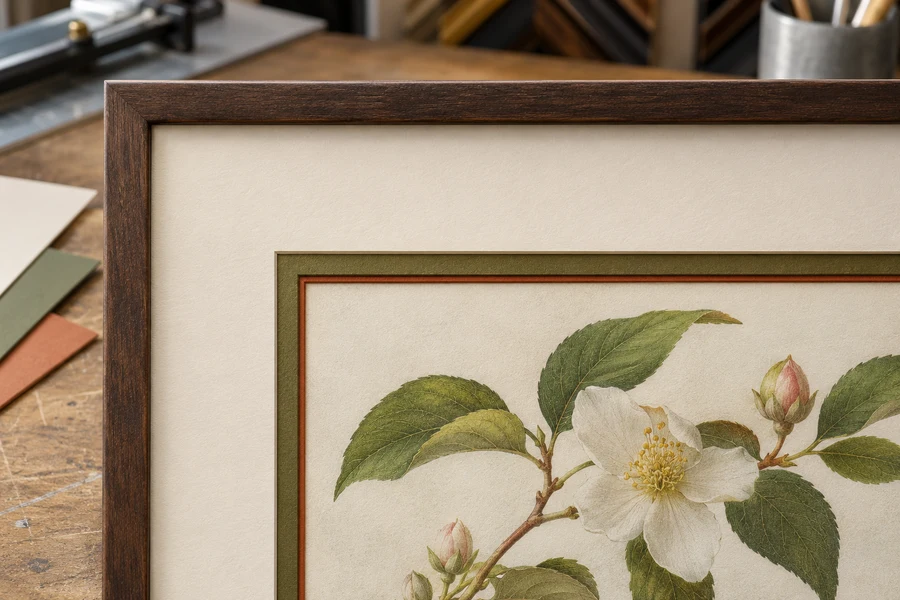
A triple mat uses three sheets of mat board with progressively sized openings. This guide separates the layers and puts them back together so you can see how two inner reveals are formed.
Watch: What Is a Triple Picture Mat?
Three sheets create two inner reveals
A triple mat consists of three separate mat sheets. The top mat provides the broad outer border. Parts of the middle and bottom mats remain visible inside its opening, forming two accent bands around the picture.
The innermost window controls the visible image area. The other openings step outward to reveal the lower colors. The thin bevel edges are separate from these face-color reveals.
Read the triple mat from top to bottom
| Layer | Visible role | Measurement to confirm |
|---|---|---|
| Top | Broad surrounding face. | Upper opening, outside dimensions, and border widths. |
| Middle | First lower color band. | Its reveal relative to the top opening. |
| Lowest | Second lower band and final image boundary. | Its reveal and the intended visible artwork window. |
| Whole package | Three sheets plus the other framing components. | Total thickness, usable rabbet, and retaining arrangement. |
Plan each layer's role
- Choose the innermost opening for the desired crop and edge coverage.
- Select a main outer color that works with the image and frame.
- Choose the two inner colors, then adjust their reveals separately.
- View the assembled layers at normal display distance. If one accent competes with the image, reduce its reveal or simplify the design.
Three mats are a construction choice rather than a requirement for every artwork. The single, double, and triple comparison shows how the same image changes as layers are added.
Check the complete package depth
Include all three sheets when comparing package thickness with the usable frame depth. Glazing, artwork, backing, and any other spacing components also occupy space. Do not assume a frame that accepts one mat will accommodate every triple-mat package.
Confirm the measurements with the mat-measuring guide, then preview the color order and reveals in the custom mat designer.
Give each of the three layers a clear role
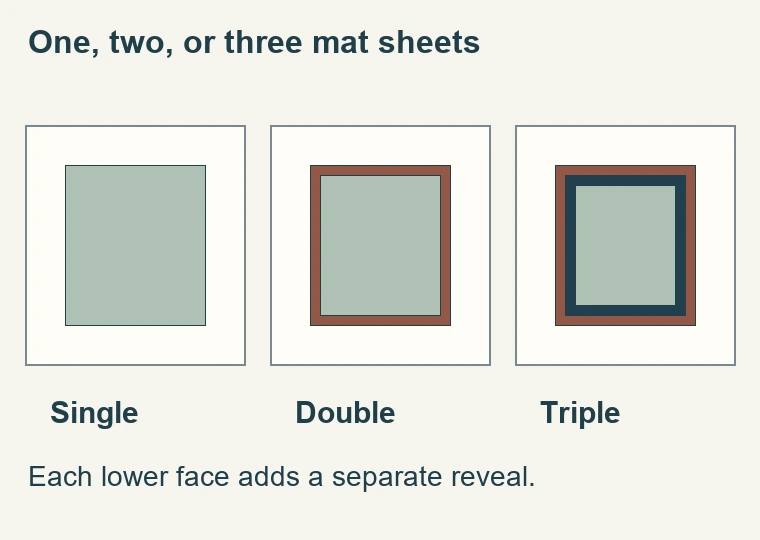
- A triple mat has one broad upper face and two lower faces exposed around the artwork window. The physical construction creates several boundaries close to the image. That can be useful when the design needs a controlled sequence of colors, but it also makes proportion and order more important. Start by identifying the job of each layer. If two reveals seem to do the same thing, compare a simpler arrangement before committing to three sheets.
- Review the stack and its narrow color bands alongside the full framing package. They are not a recommendation that every print needs three mats. An artwork with strong internal borders or many colors may need fewer surrounding accents, while another work may benefit from a carefully limited sequence. Evaluate the picture rather than treating the layer count as a ranking of framing quality.
- Consider a broad quiet upper face, a middle reveal that relates to the frame or image, and a lowest reveal that defines the picture edge. That is one possible hierarchy, not a required formula. What matters is that each visible band has a deliberate width and relationship. Compare the final appearance at normal viewing distance; two subtle colors that are distinct on the bench can merge when the picture is hung.
Plan the nested openings from the artwork outwards
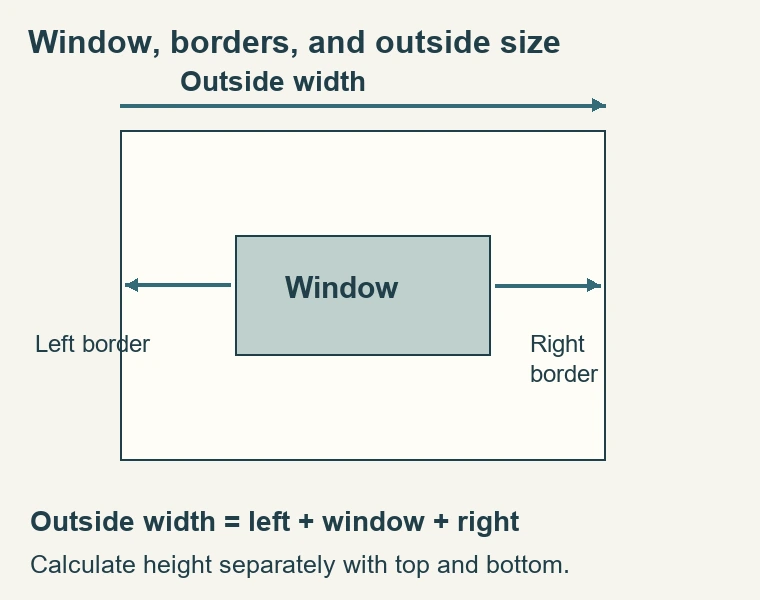
- The lowest opening establishes the visible crop in a conventional overlapping triple mat. The middle opening is larger so the lowest face shows. The upper opening is larger again so the middle face shows. Write the layer order and reveal dimensions before translating the design into an order. This avoids describing three appealing colors without explaining which one belongs closest to the picture.
- For an illustrative layout, start with an 8-by-10-inch lowest window. If the lowest reveal is a quarter inch on every side, the middle opening is 8-1/2 by 10-1/2 inches. If the next reveal is also a quarter inch, the upper opening is 9 by 11 inches. This example explains nested face dimensions only. It does not set the artwork overlap, cutting allowances, outside mat size, or a recommended reveal width.
- The outside dimensions still have to match the intended framing package. Confirm how the designer measures the broad upper border and how it handles lower reveals. When you revise a reveal, check whether the outside size or upper border changed. Do not assume that every control keeps the same reference dimension fixed. Review the stated measurements and the preview together, with the artwork in its final orientation.
Test color order as well as color selection
- Reversing the two lower colors can change the design even when the same three boards remain in use. The lowest band directly meets the artwork boundary, while the middle band relates it to the upper face. Try both orders when the distinction matters. Keep the reveals consistent during that test so you can judge the order itself rather than a simultaneous change in color and width.
- Use the artwork's actual tones as a reference without assuming that every accent must match one of them. A color that appears in a tiny image detail can become overpowering as a continuous band. A neutral band may create useful separation without introducing another strong hue. Consider the frame finish and the room lighting too. Samples should help you see those relationships rather than serve as isolated color chips chosen away from the picture.
- Test the width of each reveal independently. Equal lower bands produce one rhythm; a very narrow inner band and a wider middle band produce another. There is no universal rule requiring one arrangement. If the image feels confined by several strong lines, reduce contrast, narrow a band, or remove a layer. Adding more outside border space does not necessarily resolve excessive visual activity immediately around the artwork.
Account for the bevels in the visible sequence
- Three mats can show more than three colors because standard bevels may expose differently colored cores. Lay the complete corner stack together and count the actual visible lines. A fine white core between two dark faces can become a pronounced accent of its own. Decide whether that line is wanted before approving the design. Do not rely on a screen preview that may simplify the physical cut edges.
- A reverse bevel can reduce the visible core at a chosen opening, but it does not remove the face-color reveal of that layer. Specify the treatment for the upper, middle, and lowest opening separately where it matters. Keep those notes beside the board order. A general request for a reverse-bevel triple mat may leave uncertainty about which edges should remain visible and which should recede.
- Decorative grooves or fillets are additional decisions, not automatic features of a three-layer stack. If one is included, reassess the full sequence of boundaries around the image. Each added detail can change the available border space and visual emphasis. Confirm the physical construction and artwork-contact materials for any separate component rather than assuming that another mat sheet makes the arrangement suitable.
Measure the complete stack before choosing the frame
- Three sheets add depth, and the rest of the package still needs room. Include glazing, artwork, mounting support, backing, and any required spacer in the fit assessment. Compare their actual arrangement against the frame's usable rabbet. Overall moulding height is not the same as available internal depth. A deep-looking profile must still be checked where the package and retaining hardware actually sit.
- Do not solve a shallow-frame problem by omitting backing or necessary separation after the mats have been chosen. Reconsider the moulding or revise the design as a complete package. Likewise, do not use retaining hardware to force an over-deep stack into position. The final back location determines which retaining arrangement can work. The visual choice of three layers and the physical choice of frame depth need to agree before ordering.
- Verify the material properties of each relevant board, especially where it contacts the artwork. Three layers do not establish archival construction, and the narrowness of a lower reveal does not make its material unimportant. The actual board specifications, mounting method, backing, and display conditions remain separate considerations. Record them clearly so the colorful front does not become the only part of the framing order that is fully specified.
Check the loose layers before completing the frame
- Arrange the boards in the specified top-to-bottom order.
- Align their outside edges and inspect both reveals on all four sides.
- Place the stack over the artwork and verify the intended visible crop.
- Check every window corner for clean cuts and every face for marks.
- Confirm package depth and the planned artwork attachment.
- Inspect the front again after fitting the glazing, backing, and retaining hardware.
An uneven reveal can come from displaced sheets or from incorrect opening geometry. Identify which before attempting a correction. Measure the windows and compare the stack with the order. If the outside edges align but one band varies unexpectedly, document that difference for the supplier. Trimming the outside of one sheet may hide one symptom while creating a new alignment problem elsewhere.
Keep the final layout with the artwork record. List the lowest window, both reveal widths, outside dimensions, layer order, board selections, and any bevel preferences. That information makes a future replacement or matching piece practical. A photograph of the finished front can show the appearance, but it may not reveal the concealed outside edges or the exact construction behind the narrow color bands.
Before treating the design as finished, compare it once more with the two-layer alternative. Retain the third layer when it adds a useful distinction that remains apparent at display distance. If it only adds complexity without improving the presentation, simplify. The purpose of a triple mat is to serve the artwork through a deliberate sequence of space and color, supported by a package that fits and uses appropriate materials.
Made in the USA
Handcrafted by American framing experts
Family Owned
Serving customers for over 40 years
Premium Shipping
Professionally packaged for safe delivery
Ready to Hang
Hardware included with all frames
Framing Specialists
Over 40 years of custom framing experience
