
Ok

Ok

What is the question
Cancel
PICTURE FRAMES
 CUSTOM PICTURE FRAMES
Design Your Framing Package Online!
Add Mats, Glass & Acrylic, Mounting Board And More.





Search
☰

My Account
Log In
Favorites
Saved Designs
Shopping Cart
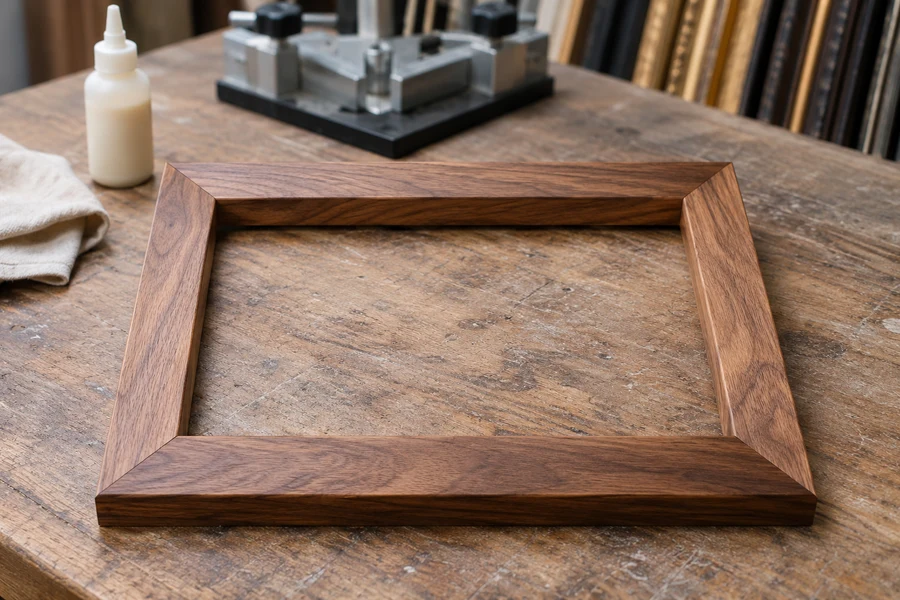
A custom wood frame moves through measuring, cutting, gluing, joining, and inspection. Prepare accurate receiving dimensions and a complete package specification before manufacture.
Watch: How a Custom Wood Picture Frame Is Cut and Joined
Cutting the four rails
A shop-made custom wood picture frame starts as moulding lengths measured at a double-miter chop saw. Angled cuts create the four rails that meet at its corners.
Two matching rails establish one dimension and another matching pair establishes the other. The finished frame must accommodate the artwork package at its opening, not simply match the outside dimensions of the moulding.
What happens between moulding length and joined frame?
| Stage | Visible operation | Customer check |
|---|---|---|
| Measure and cut | Rails are cut with the double-miter shop saw. | Correct receiving dimensions and selected moulding. |
| Arrange and glue | Four rails are laid out and glue applied at the miters. | Confirm the ordered assembly method and scope. |
| Join | The shop V-nailer joins the corners. | This differs from home dovetail-key assembly. |
| Inspect and fit | The rectangle is checked before the artwork package is installed. | Usable depth, glazing, mats, backing, retainers, and remaining fitting work. |
Gluing and joining the corners
After cutting, the rails are arranged on the bench and glue is applied at the mitered ends. The next shop stage uses a V-nailer to join the corners from the back. The completed frame is then laid flat for inspection.
This overview of a professional shop process does not establish machine settings, a universal fastener count, or operating instructions for a particular saw or joiner. Those depend on the equipment and moulding.
What to decide before a custom frame is made
Prepare the following information for the order:
- Confirm the artwork dimensions and the size of any mat, glazing, and backing that the frame must receive.
- Check usable rabbet depth against the complete package, including any required separation and retaining hardware.
- Evaluate face width and profile at the artwork's scale. Physical fit and visual proportion are separate decisions.
- Use a sample when the finish, color, or profile needs to be judged beside the artwork.
For a frame supplied for home assembly with dovetail keys, follow the two-part dovetail assembly guide. That is a different joining method from shop V-nailer joining. After assembly, continue with fitting art into a wood frame.
Understand the shop process before ordering
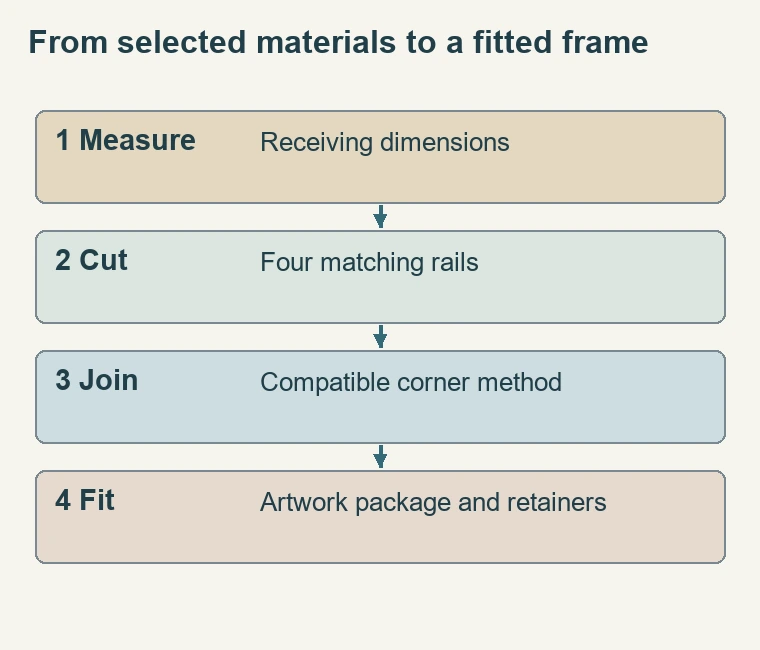
- Shop wood-frame assembly has several stages: measuring and cutting rails, arranging the four pieces, applying glue, and joining the corners with a V-nailer. These stages turn moulding lengths into a completed rectangle. For the customer, accurate planning and inspection matter at both ends of that process. This overview is separate from industrial-equipment operating instructions.
- Machine settings, guarding, blade selection, pressure, and fastener arrangements depend on the equipment and material. Do not infer a safe setup from a finished sample or use an unfamiliar machine without the equipment's instructions and appropriate training. The useful information for the order is the sequence and the need for accurate dimensions and compatible construction at each stage.
- Keep this method separate from home assembly with dovetail keys. Both join four frame rails, but the hardware, preparation, and sequence differ. A shop-joined frame and a frame supplied for dovetail assembly are different deliverables. Identify which one is being ordered before preparing tools or assuming that the joining method visible in one guide applies to the other.
Set the receiving dimensions before the moulding is cut
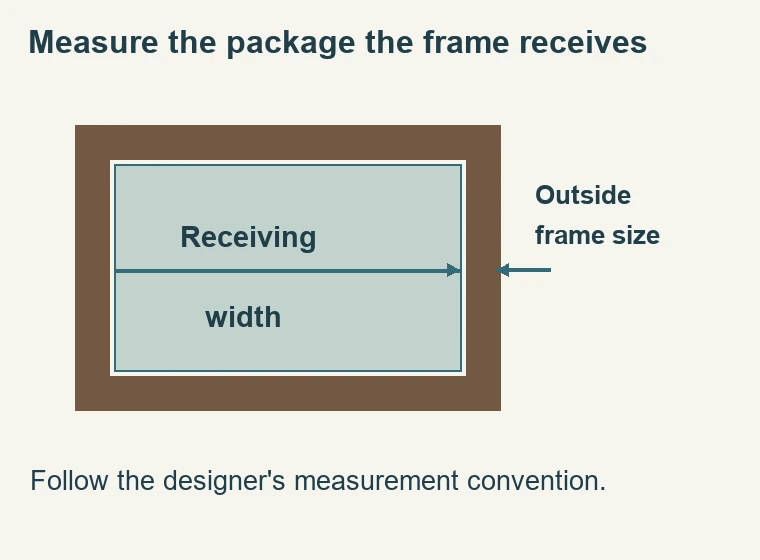
- A picture frame has several useful dimensions. The outside size describes the overall finished rectangle. The receiving opening relates to the artwork package. The visible opening is affected by the frame lip. Do not treat those measurements as interchangeable. The order should follow the current designer's prompts and allowance convention, with the actual package identified before the rails are cut.
- If the work will have a mat, measure the complete outside mat size rather than ordering the frame from only the visible image window. Glazing and backing also need the appropriate package size. If the work is an already-stretched canvas, measure the physical object and consider its thickness and shape. Different artwork packages can share a nominal image size while needing different receiving arrangements.
- Do not add an assumed cutting allowance to the requested receiving dimensions. The shop's machine and ordering system account for their own conventions. Enter the requested artwork or package measurement and clarify uncertainty before ordering. Adding an allowance twice can make a custom frame wrong even when every cut is accurately made to the submitted dimensions.
Understand why matching rails and clean miters matter
- The cutting stage creates the angled ends that meet at the corners. Opposing rails establish the two dimensions of the rectangular assembly. Their relationship matters to squareness and fit. This is why the correct receiving measurements must be settled at the beginning rather than treated as something that can be adjusted after the corners are joined.
- The moulding's face, profile, and finish continue around the rectangle. A customer can assess how those features look in a corner sample before ordering, even without operating the cutting equipment. Look at the visual width beside the artwork and consider how a shaped or strongly detailed profile frames the image. Physical accommodation and visual proportion are separate requirements.
- Material claims need independent verification. This method uses a wood frame but does not establish the species, finish technique, origin, or construction of every moulding in the catalog. Use the selected product's verified description. Do not infer a solid-wood species from a visible grain pattern in a sample or rename a product merely to make its material sound more specific.
Follow the visible glue-and-join sequence
- After cutting, the rails are arranged on the bench and glue is applied at the mitered ends. The shop process then uses a V-nailer for corner joining. These are distinct stages: accurate cutting establishes the meeting surfaces, while the joining process assembles and secures the corners. Do not assume a visible gap can be corrected simply by adding more glue or fasteners.
- This method does not provide a universal adhesive cure schedule, fastener count, or joining pressure. Those belong to the actual materials and equipment. If you are ordering a supplied assembly, ask about its delivery and fitting scope rather than guessing when the corner construction is ready for handling. If assembling a different frame at home, use that frame's own instructions instead of adapting the shop equipment sequence.
- Lay the completed rectangle flat for inspection. That is an opportunity to look at the corner meeting and overall arrangement before artwork is introduced. A finished appearance at the front is important, but it does not establish all hidden material or load properties. Assess the supplied frame according to the selected product and order, with the package and display requirements kept in view.
Verify depth before the frame is selected
- Usable rabbet depth determines how the package can sit inside the moulding. Include glazing, mats, artwork support, backing, and any spacers that the project needs. Overall moulding height is not the same dimension. A profile can look deep from the side while offering a different internal recess, so use the actual specification rather than judging only a photograph.
- Determine where the completed back will sit and how it will be retained. Points, tabs, and offset clips are not interchangeable solutions for every depth arrangement. The retaining method should suit the frame and package without crushing or distorting the contents. Do not choose a shallow moulding first and then remove required support or separation merely to make the completed order fit.
- Consider the frame's visual scale separately. A physically suitable profile can still look too heavy or too slight around a particular image. Use samples where the finish or shape is uncertain. The shop can cut and join accurately only after the actual design is selected; precise manufacture does not resolve an undecided color, inappropriate visual proportion, or missing package requirement.
Inspect a delivered frame before fitting artwork
- Confirm the selected moulding and finish against the order.
- Inspect the frame face and all four corner meetings for visible damage or discrepancies.
- Check the receiving dimensions using the order's measurement convention.
- Confirm usable depth and dry-fit the intended package without force.
- Review the supplied retainers and any remaining fitting components.
- Resolve an apparent error before attaching the artwork or altering the frame.
If the package does not fit, identify which reference dimension is wrong. An image window, paper size, outside mat size, and outside moulding size can be confused during planning. Compare the actual order with the actual receiving opening before concluding that the shop cut incorrectly. A clear measurement and photograph of the relevant boundary are more useful than a general statement that the frame is too small.
Do not force glazing or backing into a mismatched opening, and do not dismantle a supplied joined corner casually to change its size. Obtain the appropriate resolution from the supplier. The joining process creates a finished assembly; altering it is a different task from fitting the ordered package and may not be appropriate for the delivered construction.
Distinguish a joined frame from a completed framing package
- A frame assembled in the shop does not automatically arrive with your artwork installed. Review whether the order includes glazing, mats, backing, artwork retainers, a hanging kit, or fitting service. Keep frame-to-frame assembly and artwork installation distinct. A joined rectangle is one stage; the rest of the package still needs to be selected and fitted as required.
- Keep a concise record of artwork and package measurements, selected moulding, usable depth, supplied assembly method, and remaining work. This makes the next fitting stage straightforward and helps when ordering a related piece later. Accurate planning connects the manufacturing sequence to the ordered result, while machine-specific operation remains the responsibility of the trained operator following the equipment instructions.
Made in the USA
Handcrafted by American framing experts
Family Owned
Serving customers for over 40 years
Premium Shipping
Professionally packaged for safe delivery
Ready to Hang
Hardware included with all frames
Framing Specialists
Over 40 years of custom framing experience
